開源網路裝置管理系統 LibreNMS - Debian 10
這是一套從 Jason Cheng大看到文章發現到還不錯用監控軟體。
109.09.14 因新公司要安裝 LibreNMS 服務,之前的安裝方式是 CentOS 7 版本使用,那剛剛去查看官方網站已經修改為 CentOS 8,因此本篇會重新修改為官方所提供的版本流程。
110.03.16 新增 Debain 10 安裝方式記錄
111.09.08 更新到 php 8.1 (官方已建議要到 8.1版本)、更新其他服務版本及安裝流程
運行環境
環境都是在 「Proxmox VE 」 虛擬系統上架設,都是以 「 LXC 」模式為主,除非有特殊狀況會告知使用 「 VM 」 模式
- 系統環境: Debain 10
- Web 服務: Nginx 1.23.1
- PHP 服務: PHP 8.1
- 資料庫服務: MariaDB 10.9
安裝過程
安裝 web 服務
- 安裝 nginx 必要套件
sudo apt install -y curl gnupg2 ca-certificates lsb-release debian-archive-keyring
- 導入官方金鑰來確認該套件安全性
curl https://nginx.org/keys/nginx_signing.key | gpg --dearmor \
    | sudo tee /usr/share/keyrings/nginx-archive-keyring.gpg >/dev/null

# 驗證現在的金鑰是否正確
gpg --dry-run --quiet --import --import-options import-show /usr/share/keyrings/nginx-archive-keyring.gpg

# 輸出的指紋如下 573BFD6B3D8FBC641079A6ABABF5BD827BD9BF62
pub   rsa2048 2011-08-19 [SC] [expires: 2024-06-14]
      573BFD6B3D8FBC641079A6ABABF5BD827BD9BF62
uid                      nginx signing key <[email protected]>
- 新增官方來源庫
# 來源庫新增加穩定版 nginx 服務
echo "deb [signed-by=/usr/share/keyrings/nginx-archive-keyring.gpg] \
http://nginx.org/packages/debian `lsb_release -cs` nginx" \
    | sudo tee /etc/apt/sources.list.d/nginx.list

# 來源庫新增加主線 nginx 服務
echo "deb [signed-by=/usr/share/keyrings/nginx-archive-keyring.gpg] \
http://nginx.org/packages/mainline/debian `lsb_release -cs` nginx" \
    | sudo tee /etc/apt/sources.list.d/nginx.list
- 安裝 nginx 服務
sudo apt update
sudo apt install -y nginx
- 啟動及自動啟動服務
systemctl start nginx && systemctl enable nginx
安裝資料庫
- 安裝密鑰及來源庫 官方下載點
sudo apt-get install -y apt-transport-https curl -y
sudo curl -o /etc/apt/trusted.gpg.d/mariadb_release_signing_key.asc 'https://mariadb.org/mariadb_release_signing_key.asc'
sudo sh -c "echo 'deb https://ftp.ubuntu-tw.org/mirror/mariadb/repo/10.9/debian buster main' >>/etc/apt/sources.list"
- 安裝 MariaDB 服務
sudo apt-get update
sudo apt-get -y install mariadb-server
- 啟動服務
systemctl enable mariadb && systemctl start mariadb
- 資料庫安裝及設定
mariadb-secure-installation   # 設定資料庫的root密碼

NOTE: RUNNING ALL PARTS OF THIS SCRIPT IS RECOMMENDED FOR ALL MariaDB
      SERVERS IN PRODUCTION USE!  PLEASE READ EACH STEP CAREFULLY!

In order to log into MariaDB to secure it, we'll need the current
password for the root user. If you've just installed MariaDB, and
haven't set the root password yet, you should just press enter here.

Enter current password for root (enter for none):
OK, successfully used password, moving on...

Setting the root password or using the unix_socket ensures that nobody
can log into the MariaDB root user without the proper authorisation.

You already have your root account protected, so you can safely answer 'n'.

Switch to unix_socket authentication [Y/n]    <----- 直接按下 enter 鍵
Enabled successfully!
Reloading privilege tables..
 ... Success!


You already have your root account protected, so you can safely answer 'n'.

Change the root password? [Y/n]               <----- 直接按下 enter 鍵
New password:                                 <----- 輸入 root 密碼
Re-enter new password:                        <----- 再次輸入 root 密碼
Password updated successfully!
Reloading privilege tables..
 ... Success!


By default, a MariaDB installation has an anonymous user, allowing anyone
to log into MariaDB without having to have a user account created for
them.  This is intended only for testing, and to make the installation
go a bit smoother.  You should remove them before moving into a
production environment.

Remove anonymous users? [Y/n]
 ... Success!

Normally, root should only be allowed to connect from 'localhost'.  This
ensures that someone cannot guess at the root password from the network.

Disallow root login remotely? [Y/n]
 ... Success!

By default, MariaDB comes with a database named 'test' that anyone can
access.  This is also intended only for testing, and should be removed
before moving into a production environment.

Remove test database and access to it? [Y/n]
 - Dropping test database...
 ... Success!
 - Removing privileges on test database...
 ... Success!

Reloading the privilege tables will ensure that all changes made so far
will take effect immediately.

Reload privilege tables now? [Y/n]
 ... Success!

Cleaning up...

All done!  If you've completed all of the above steps, your MariaDB
installation should now be secure.

Thanks for using MariaDB!
- 在
server.cnf檔增加以下內容vim /etc/mysql/mariadb.conf.d/50-server.cnf
[mysqld]
innodb_file_per_table=1
lower_case_table_names=0
- 新增加 LibreNMS 表單
mariadb -u root -p
CREATE DATABASE librenms CHARACTER SET utf8mb4 COLLATE utf8mb4_unicode_ci;
CREATE USER 'librenms'@'localhost' IDENTIFIED BY 'password';  <----- 這裡的 password 修改成您自己記的住密碼
GRANT ALL PRIVILEGES ON librenms.* TO 'librenms'@'localhost';
FLUSH PRIVILEGES;
exit
- 重啟資料庫
systemctl restart mariadb
- 設定資料庫
root免密碼就可以登入,請參考本篇進行修改 MariaDB root 可空白登入
安裝 php 服務
- 安裝 php 必要套件
apt install -y apt-transport-https lsb-release ca-certificates wget
- 新增 php 金鑰
wget -O /etc/apt/trusted.gpg.d/php.gpg https://packages.sury.org/php/apt.gpg
- 新增 PHP 來源庫
echo "deb https://packages.sury.org/php/ $(lsb_release -sc) main" > /etc/apt/sources.list.d/sury-php.list && apt update
- 安裝 php 及其他必要套件
apt install -y acl curl fping git graphviz imagemagick mtr-tiny nmap php8.1-cli php8.1-curl php8.1-fpm php8.1-gd php8.1-gmp php8.1-mbstring php8.1-mysql php8.1-snmp php8.1-xml php8.1-zip python3-dotenv python3-pymysql python3-redis python3-setuptools python3-systemd python3-pip rrdtool snmp snmpd whois
- 安裝 Composer 作曲家
# 將dirs更改為我們希望將composer安裝到的位置
cd /usr/local/bin

# 安裝 composer
curl -sS https://getcomposer.org/installer | php

# 重新命名 composer
mv composer.phar composer
安裝 Librenms 服務
- 新增加 librenms 使用者
useradd librenms -d /opt/librenms -M -r -s "$(which bash)"
- 下載 Librenms 服務
cd /opt
git clone https://github.com/librenms/librenms.git
- 設定權限
chown -R librenms:librenms /opt/librenms
chmod 771 /opt/librenms
setfacl -d -m g::rwx /opt/librenms/rrd /opt/librenms/logs /opt/librenms/bootstrap/cache/ /opt/librenms/storage/
setfacl -R -m g::rwx /opt/librenms/rrd /opt/librenms/logs /opt/librenms/bootstrap/cache/ /opt/librenms/storage/
- 安裝 LibreNMS 及 php 相關套件
su - librenms
./scripts/composer_wrapper.php install --no-dev
exit
有發現到在切換使用 su - librenms 會出現錯誤訊息,如下
su: failed to execute /usr/bin/bash: No such file or directory

如出現以上的訊息解決方式如下
# 到 passwd 檔修改路徑
vim  /etc/passwd

要修改的是我們剛剛幫 librenms 有建一個帳號,要修改此帳號
修改前
librenms:x:100:100::/opt/librenms:/usr/bin/bash
修改後
librenms:x:100:100::/opt/librenms:/bin/bash
設定 php 服務
- 安裝好要去修改 php 設定檔
vim /etc/php/8.1/fpm/php.ini
vim /etc/php/8.1/cli/php.ini
- 修改時區
[Date]
修改前
;date.timezone =
修改後
date.timezone = Asia/Taipei
存檔
:wq

# 指令修改
sed -i "s|^;date.timezone =.*$|date.timezone = Asia/Taipei|" /etc/php/8.1/fpm/php.ini
sed -i "s|^;date.timezone =.*$|date.timezone = Asia/Taipei|" /etc/php/8.1/cli/php.ini
- 新增加 librenms PHP-FPM 設定檔
cp /etc/php/8.1/fpm/pool.d/www.conf /etc/php/8.1/fpm/pool.d/librenms.conf
vim /etc/php/8.1/fpm/pool.d/librenms.conf
- 修改內容如下
將 [www] 修改為 [librenms]

user = librenms
group = librenms

listen = /run/php-fpm-librenms.sock

# 指令修改
sed -i 's/\[www\]/\[librenms\]/g' /etc/php/8.1/fpm/pool.d/librenms.conf
sed -i "s|^user = www-data.*$|user = librenms|" /etc/php/8.1/fpm/pool.d/librenms.conf
sed -i "s|^group = www-data.*$|group = librenms|" /etc/php/8.1/fpm/pool.d/librenms.conf
sed -i "s|^listen = /run/php/php8.1-fpm.sock.*$|listen = /run/php-fpm-librenms.sock|" /etc/php/8.1/fpm/pool.d/librenms.conf
- 設定開機自動啟動及重啟服務
systemctl enable php8.1-fpm ; systemctl restart php8.1-fpm
設定 Web 服務
- 修改全域設定檔
vim /etc/nginx/nginx.conf
# 修改前
user  nginx;

# 修改後
user  www-data;

# 指令修改
sed -i 's|^user  nginx;.*$|user  www-data;|' /etc/nginx/nginx.conf
- 新增加 LibreNMS 設定檔
vim /etc/nginx/conf.d/librenms.conf
- 將以下內容貼到
librenms.conf編輯server_name修改成站台位置
server {
    listen 80;
    server_name librenms.example.com;
    root /opt/librenms/html;
    index index.php;

    charset utf-8;
    gzip on;
    gzip_types text/css application/javascript text/javascript application/x-javascript image/svg+xml text/plain text/xsd text/xsl text/xml image/x-icon;
    location / {
        try_files $uri $uri/ /index.php?$query_string;
    }
    location ~ [^/]\.php(/|$) {
        fastcgi_param SCRIPT_FILENAME $document_root$fastcgi_script_name;
        fastcgi_param PATH_INFO $fastcgi_path_info;
        fastcgi_pass unix:/run/php-fpm-librenms.sock;
        fastcgi_split_path_info ^(.+\.php)(/.+)$;
        include fastcgi_params;
    }
    location ~ /\.(?!well-known).* {
        deny all;
    }
}
- 重啟 web 服務
systemctl restart nginx
設定 lnms 服務
- 啟用 lnms
ln -s /opt/librenms/lnms /usr/bin/lnms
cp /opt/librenms/misc/lnms-completion.bash /etc/bash_completion.d/
設定 SNMP 服務
- 從樣版複製一份
cp /opt/librenms/snmpd.conf.example /etc/snmp/snmpd.conf
- 編輯設定檔將 「RANDOMSTRINGGOESHERE」 修改或預設 public
vim /etc/snmp/snmpd.conf
- 下載
librenms-agent套件
curl -o /usr/bin/distro https://raw.githubusercontent.com/librenms/librenms-agent/master/snmp/distro
chmod +x /usr/bin/distro
systemctl enable snmpd && systemctl restart snmpd
設定排程
- 從 Librenms 目錄下複製到 cron.d 裡面
cp /opt/librenms/librenms.nonroot.cron /etc/cron.d/librenms
設定 logrotate
- 複製 logrotate 設定檔
cp /opt/librenms/misc/librenms.logrotate /etc/logrotate.d/librenms
開始安裝 LibreNMS
- 開啟瀏灠器輸入
http://librenms.example.com/install.php(站台位置)
- 檢測安裝環境是否有正常,如果出現異常要把缺的套件都安裝起來才能正常運

- 填入要連接的資料庫名稱及登入帳號及密碼

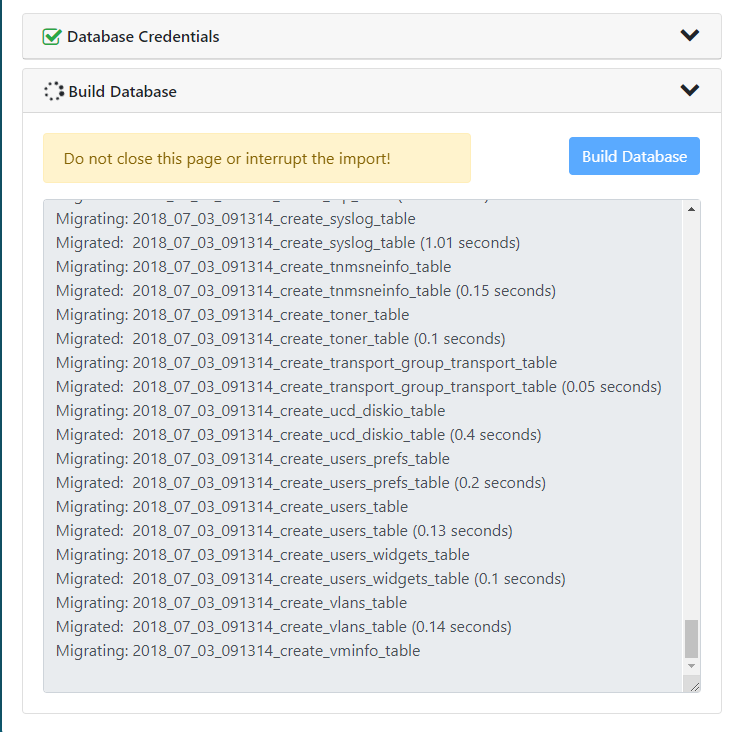
- 會自動建立資料庫裡面表單
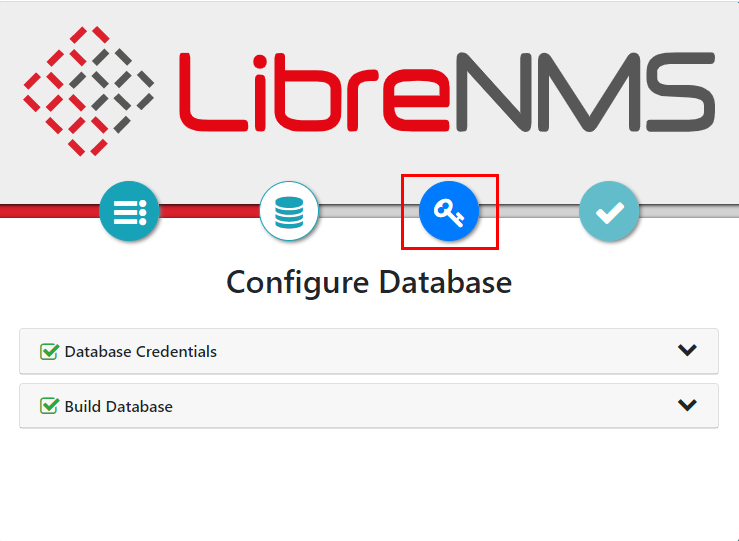
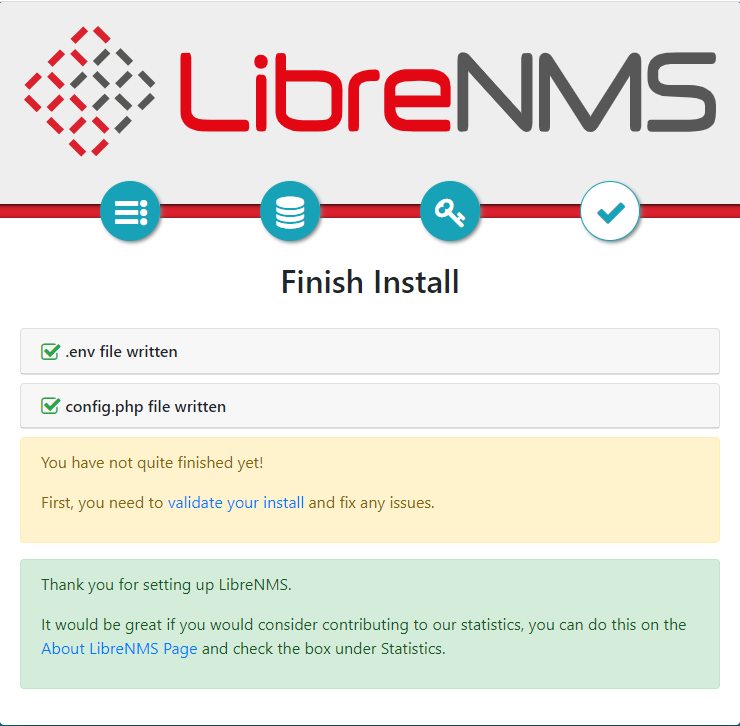
- 確認完成的畫面,直接按下下一個圖示繼續
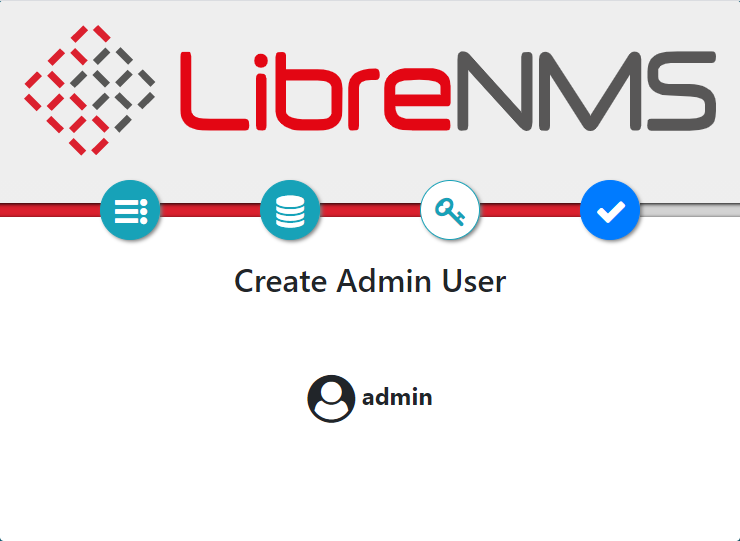
- 填入要登入的系統管理員的帳號、密碼及電子郵件

- 已產生管理者的帳號
- 安裝完成了的畫面,可以點選
Validate這個選項確認說服務是否有正確安裝完成
最後確認 Final steps
- 如果安裝有問題,請在「librenms」目錄下以「root」身份運行「 validate.php 」
cd /opt/librenms
./validate.php
- 以
librenms權限來執行確認
sudo su - librenms
./validate.php
備註
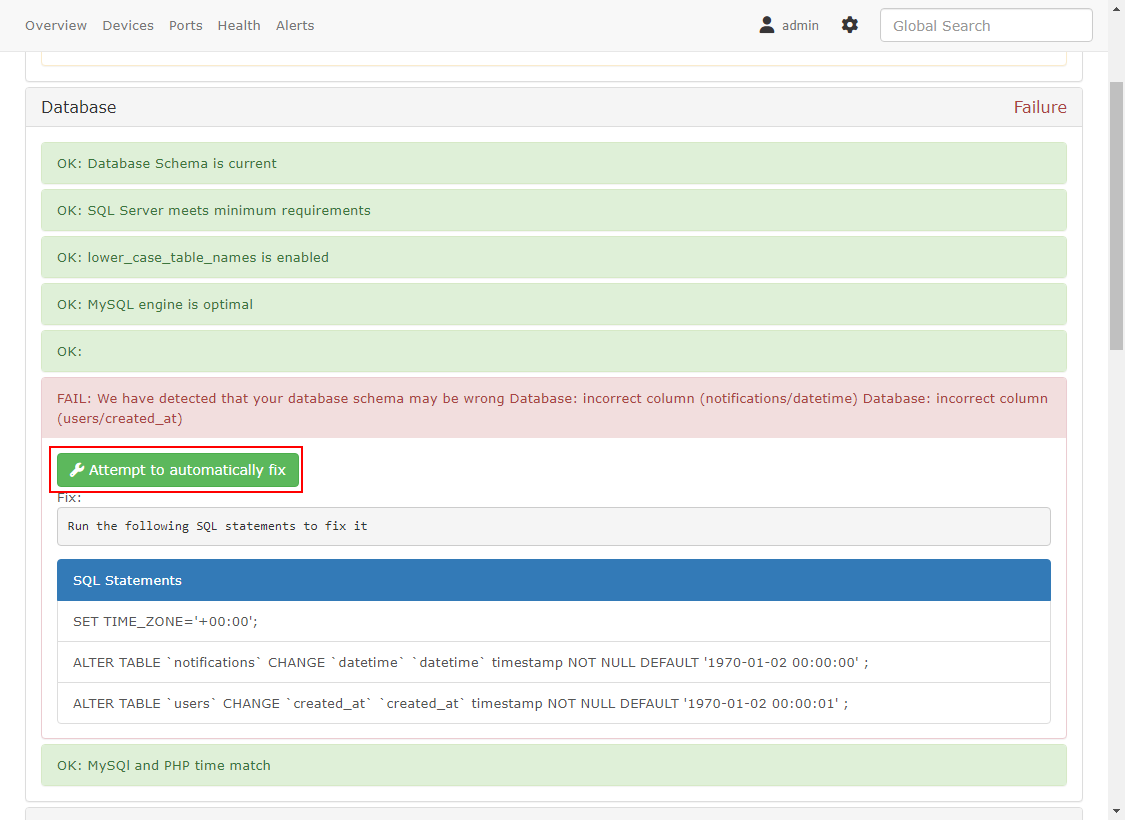
- BUBU 檢查系統狀態,系統顯示資料庫時間有異常,在最新版本已可以透過按鍵進行修正,修正完之後請手動重新整理頁面就系統會顯示正常