NetworkManager 管理網路介面
因 BUBU 之前在使用 CentOS 的時候,在文字介面都是用這一套管理介面來進行站台的 IP 設定。
CentOS 系統設定
CentOS 系統預設都已有安裝好此套件
- 檢查套件目前狀態
systemctl status NetworkManager
- 檢查目前該站台有幾張網卡
nmcli dev status
結果如下:
- 系統預設不會有 UI 介面需要另外安裝 UI 介面套件
yum install NetworkManager-tui -y
- 使用
nmtui指令來編輯
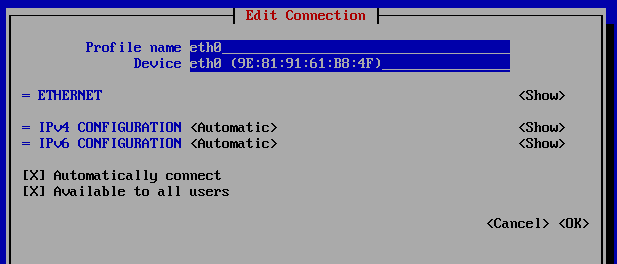
nmtui edit eth0
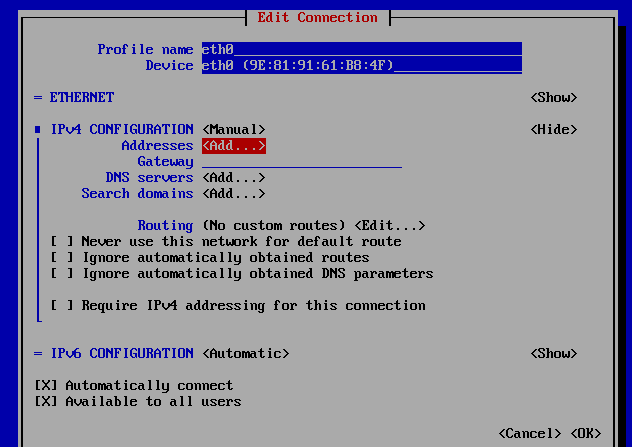
顯示如下:
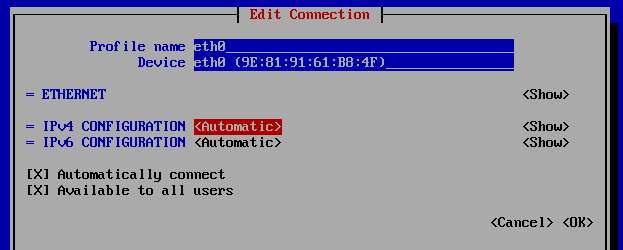
- 選項指到 IPv4 的 Automatic
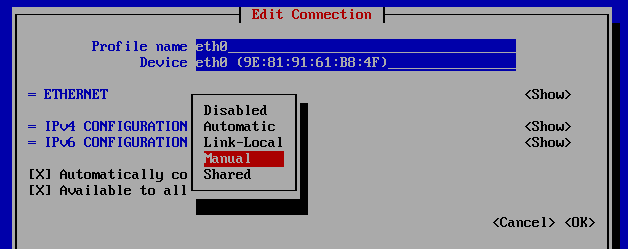
- 選擇 Manual
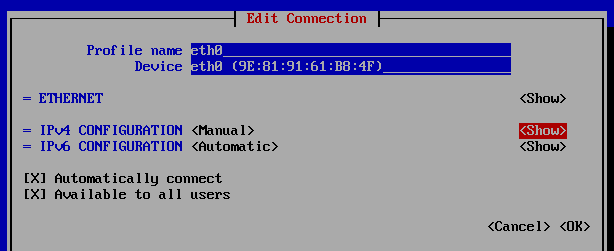
- 選擇 Show
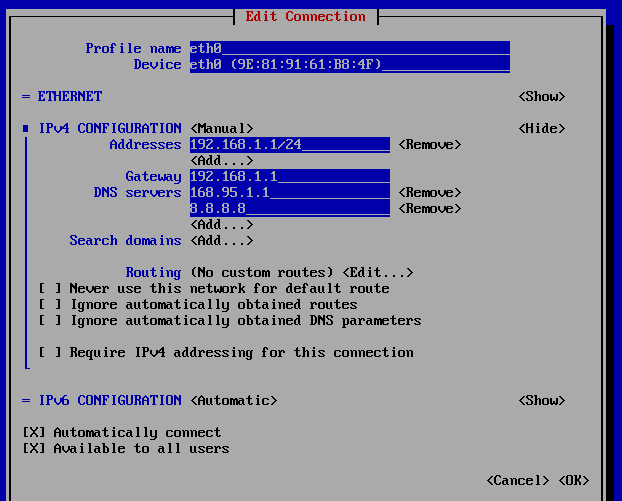
- 在 Addresses 、 DNS servers 都按下 Add 填入資訊
- 填入畫面如下,填完之後按下 OK 就會離開此畫面
- 重啟網卡服務
systemctl restart network
Debian \ Ubuntu 系統設定
Debian \ Ubuntu 這系統上並沒有這一套服務需另外安裝才能進行管理
- 套件安裝
apt install NetworkManager
- 修改預設管理程式
vim /etc/network/interfaces
# 修改前
# The primary network interface
allow-hotplug ens18
iface ens18 inet dhcp


# 修改後 將最後兩行給註解
# The primary network interface
#allow-hotplug ens18
#iface ens18 inet dhcp
- 重新啟動服務
systemctl restart networking
- 啟動 NetworkManager 服務
systemctl start NetworkManager
- 檢查目前該站台有幾張網卡
nmcli dev status
- 使用
nmtui指令來編輯
nmtui edit ens18
- 修改完重啟網卡設定值或者重新整個站台系統
ifconfig ens18 down

ifconfig ens18 up


