
Gitea 安裝流程
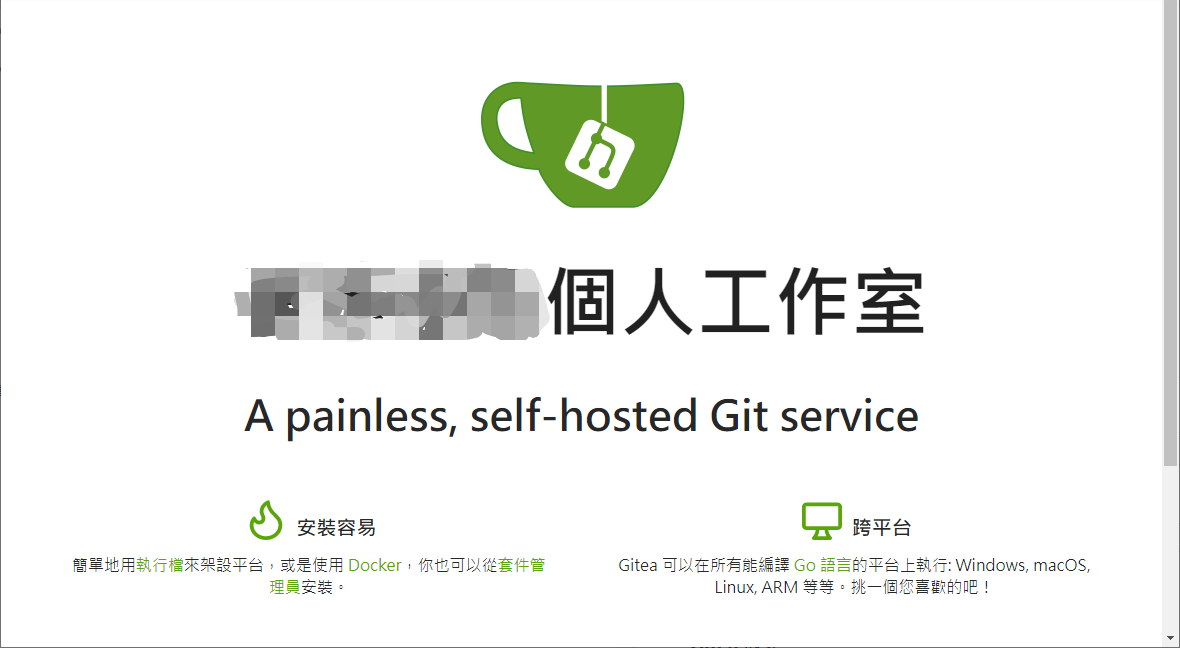
BUBU 因之前有測試 GitLab 發現到他資源吃很重而且功能還強大,用不了這麼多功能,因此無意中看到有人使用 Gitea 這套服務使用,介面跟 GitHub 差不多一樣並且也有中文化,重點該服務的資源吃不重,這是用 Go 語言寫出來的服務,官方文件上可以參考看看與其他服務功能做功能比較。
2024.11.06 記錄更新到 1.22 時資料庫規則需修改為 utf8mb4_0900_as_cs 此規則
運行環境
環境都是在 「Proxmox VE 」 虛擬系統上架設,都是以 「 LXC 」模式為主,除非有特殊狀況會告知使用 「 VM 」 模式
- 系統環境: Debian 10、11
- Web 服務: Nginx 1.22
- 資料庫服務: MariaDB 10.10
安裝或測試過程
- 安裝 Gitea 很簡單,只要先安裝好 web 服務及資料庫,系統再做調整就可以運行了
安裝 Web 服務
- 安裝 Nginx 必要套件
sudo apt install -y curl gnupg2 ca-certificates lsb-release debian-archive-keyring
- 導入官方金鑰來確認該套件安全性
curl https://nginx.org/keys/nginx_signing.key | gpg --dearmor \
    | sudo tee /usr/share/keyrings/nginx-archive-keyring.gpg >/dev/null
- 驗證現在的金鑰是否正確
gpg --dry-run --quiet --import --import-options import-show /usr/share/keyrings/nginx-archive-keyring.gpg
- 輸出的指紋如下 573BFD6B3D8FBC641079A6ABABF5BD827BD9BF62
pub   rsa2048 2011-08-19 [SC] [expires: 2024-06-14]
      573BFD6B3D8FBC641079A6ABABF5BD827BD9BF62
uid                      nginx signing key <[email protected]>
- 增加來源庫
echo "deb [signed-by=/usr/share/keyrings/nginx-archive-keyring.gpg] \
http://nginx.org/packages/debian `lsb_release -cs` nginx" \
    | sudo tee /etc/apt/sources.list.d/nginx.list
- 安裝 Nginx 服務
sudo apt update
sudo apt install nginx
- 啟動及自動啟動服務
systemctl start nginx ; systemctl enable nginx
MairaDB 安裝
- 安裝密鑰及來源庫 官方下載點
sudo apt-get -y install apt-transport-https curl
sudo curl -o /etc/apt/trusted.gpg.d/mariadb_release_signing_key.asc 'https://mariadb.org/mariadb_release_signing_key.asc'
sudo sh -c "echo 'deb https://ftp.ubuntu-tw.org/mirror/mariadb/repo/10.10/debian bullseye main' >>/etc/apt/sources.list"
- 安裝 MariaDB 服務
sudo apt-get update && sudo apt-get -y install mariadb-server
- 啟動服務
systemctl enable mariadb && systemctl start mariadb
- 設定
mariadbroot密碼及基本設定
mariadb-secure-installation

NOTE: RUNNING ALL PARTS OF THIS SCRIPT IS RECOMMENDED FOR ALL MariaDB
      SERVERS IN PRODUCTION USE!  PLEASE READ EACH STEP CAREFULLY!

In order to log into MariaDB to secure it, we'll need the current
password for the root user. If you've just installed MariaDB, and
haven't set the root password yet, you should just press enter here.

Enter current password for root (enter for none):
OK, successfully used password, moving on...

Setting the root password or using the unix_socket ensures that nobody
can log into the MariaDB root user without the proper authorisation.

You already have your root account protected, so you can safely answer 'n'.

Switch to unix_socket authentication [Y/n]
Enabled successfully!
Reloading privilege tables..
 ... Success!


You already have your root account protected, so you can safely answer 'n'.

Change the root password? [Y/n]
New password:             << 填入 root 密碼
Re-enter new password:    << 填入 root 密碼
Password updated successfully!
Reloading privilege tables..
 ... Success!


By default, a MariaDB installation has an anonymous user, allowing anyone
to log into MariaDB without having to have a user account created for
them.  This is intended only for testing, and to make the installation
go a bit smoother.  You should remove them before moving into a
production environment.

Remove anonymous users? [Y/n]
 ... Success!

Normally, root should only be allowed to connect from 'localhost'.  This
ensures that someone cannot guess at the root password from the network.

Disallow root login remotely? [Y/n]
 ... Success!

By default, MariaDB comes with a database named 'test' that anyone can
access.  This is also intended only for testing, and should be removed
before moving into a production environment.

Remove test database and access to it? [Y/n]
 - Dropping test database...
 ... Success!
 - Removing privileges on test database...
 ... Success!

Reloading the privilege tables will ensure that all changes made so far
will take effect immediately.

Reload privilege tables now? [Y/n]
 ... Success!

Cleaning up...

All done!  If you've completed all of the above steps, your MariaDB
installation should now be secure.

Thanks for using MariaDB!
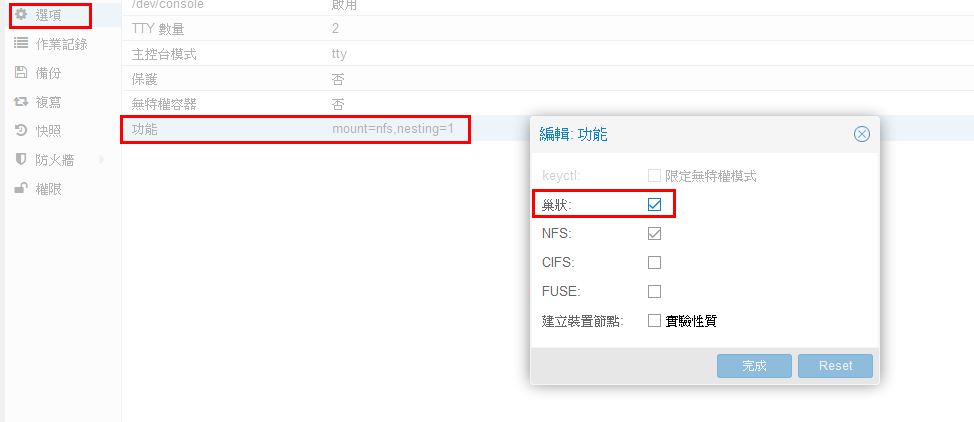
- 如果無法正常啟動話,因為環境是 LXC 造成無法正常啟動,所以要先關掉 LXC 服務,去做設定,如圖下
- 資料庫設定
# 登入資料庫裡設定資表及權限
mariadb -u root -p

# 在資料庫裡新增Gitea表單
CREATE DATABASE IF NOT EXISTS gitea DEFAULT CHARACTER SET utf8mb4 COLLATE utf8mb4_unicode_ci;

# 密碼請自己輸入好記錄的密碼
GRANT ALL PRIVILEGES ON gitea.* TO 'giteauser'@'localhost' IDENTIFIED BY 'password' WITH GRANT OPTION;

# 重新載入設定值
FLUSH PRIVILEGES;

# 離開資料庫
exit
Gitea 安裝
- 下載 Gitea 服務
wget -O /usr/bin/gitea https://github.com/go-gitea/gitea/releases/download/v1.18.0/gitea-1.18.0-linux-amd64
- Gitea 設定成能執行
chmod +x /usr/bin/gitea
- 新增加 Gitea 使用者跟群組
adduser --system --group --disabled-password git
- 在 home 新增加目錄並且給序權限
mkdir -p /home/git/{custom,data,log}
chown -R git:git /home/git
chmod -R 750 /home/git
- 設定 Gitea 服務
vim /etc/systemd/system/gitea.service
[Unit]
Description=Gitea (Git with a cup of tea)
After=syslog.target
After=network.target
Requires=mariadb.service

[Service]
RestartSec=2s
Type=simple
User=git
Group=git
WorkingDirectory=/home/git
ExecStart=/usr/bin/gitea web --config /home/git/app.ini
Restart=always
Environment=USER=git HOME=/home/git GITEA_WORK_DIR=/home/git


[Install]
WantedBy=multi-user.target
- 啟動 Gitea 服務
sudo systemctl daemon-reload && sudo systemctl enable --now gitea.service
- 確認 Gitea 目前狀態
systemctl status gitea.service
Nginx 設定
#
server {
    listen 80;
    server_name 您的網域;
    rewrite ^(.*)$ https://${server_name}$1 permanent;
}
#
server {
    listen 443 ssl http2;
    listen [::]:443 ssl http2;
    server_name 您的網域;
#
# certs sent to the client in SERVER HELLO are concatenated in ssl_certificate
#
    ssl_certificate /etc/nginx/ssl/fullchain.pem;
    ssl_certificate_key /etc/nginx/ssl/privkey.pem;
    ssl_session_timeout 1d;
    ssl_session_cache shared:SSL:50m;
    ssl_session_tickets on;
#
# intermediate configuration. tweak to your needs.
#
    ssl_protocols TLSv1.3 TLSv1.2 TLSv1.1;
    ssl_ciphers 'TLS13-AES-256-GCM-SHA384:TLS13-CHACHA20-POLY1305-SHA256:TLS13-AES-128-GCM-SHA256:TLS13-AES-128-CCM-8-SHA256:TLS13-AES-128-CCM-SHA256:EECDH+CHACHA20:EECDH+CHACHA20-draft:EECDH+ECDSA+AES128:EECDH+aRSA+AES128:RSA+AES128:EECDH+ECDSA+AES256:EECDH+aRSA+AES256:RSA+AES256:EECDH+ECDSA+3DES:EECDH+aRSA+3DES:RSA+3DES:!MD5';
    ssl_prefer_server_ciphers on;
#
    access_log /var/log/nginx/gitea_access.log;
    error_log /var/log/nginx/gitea_error.log;
#
    location / {
    	proxy_set_header Host $http_host;
    	proxy_set_header X-Real-IP $remote_addr;
    	proxy_set_header Upgrade $http_upgrade;
    	proxy_set_header Connection "upgrade";
    	proxy_set_header X-Forwarded-For $proxy_add_x_forwarded_for;
    	proxy_redirect off;
        proxy_pass http://localhost:3000;
    }
}
安裝設定
-
開啟網頁連線到
http://ip/install日後會在補充畫面 -
連線成功的畫面
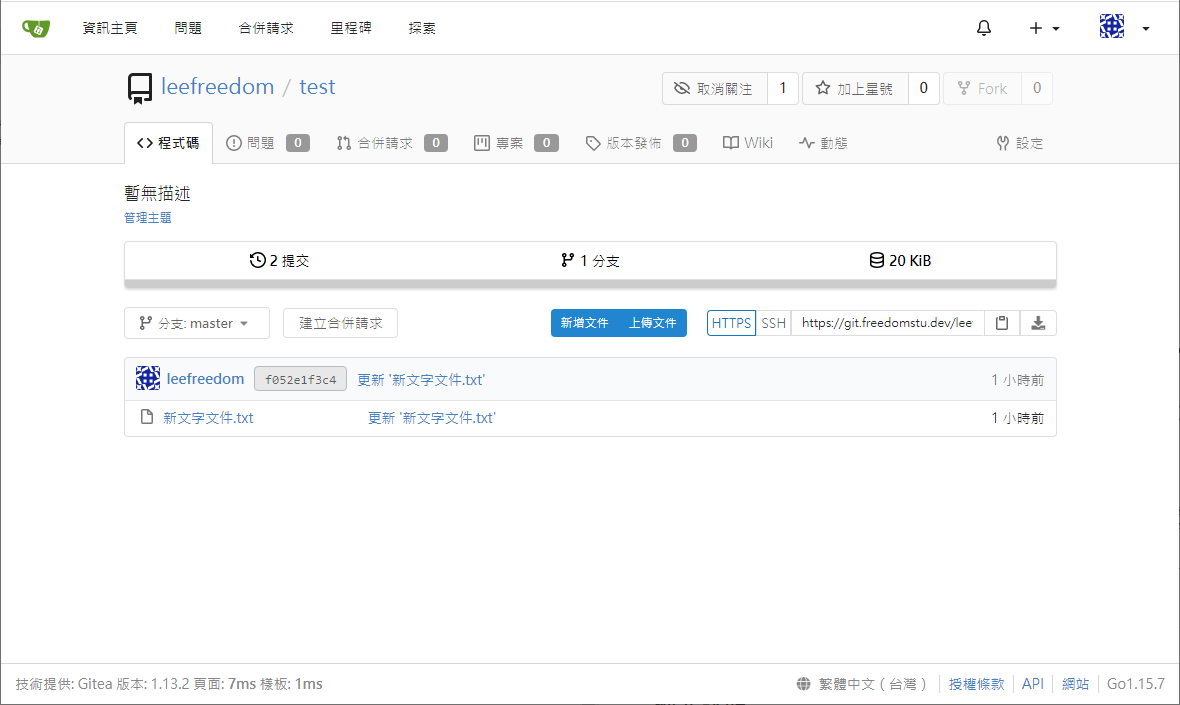
- 進來之後的畫面
Gitea 設定
- Gitea 設定檔都在
/home/git/app.ini
Gitea版本更新
-
Gitea 版本更新很簡單,但會建議更新前先把系統服務先備份一下或者快照再來更新。再另外建議如果您的 gitea 版本跟現行的版本差異很大的話最好是一個版本個版本更新,每更新一個版本就先確認功能是否有異常有可能每次大改版資料架構或者程式架構會有所改變造成某些連結會失效或者功能跑掉之類的。
-
gitea 服務停止
systemctl stop gitea
- 去官方下載新版 gitea 程式
wget -O /usr/bin/gitea https://github.com/go-gitea/gitea/releases/download/v1.16.5/gitea-1.16.5-linux-amd64
- 啟動 gitea 服務,啟動時需要等下因為程式有可能在更新資料結構需要一點時間才會服務才會正常運行。
systemctl start gitea
補充說明-1
BUBU 今日在做版本更新的時候原本的版本是 1.19 要更新到 1.20 發現到服務無法正常運行,後來有在討論區找到怎麼排除此問題。
- 設定
app.ini
# 修改前
[server]
LFS_CONTENT_PATH=xxxxx

#修改後
[lfs]
PATH=xxxxx
參考相關網頁
補充說明-2
BUBU 今日在做版本更新的時候原本的版本是 1.21 要更新到 1.22 系統有提示需將資料庫規則修改為 utf8mb4_0900_as_cs 才不會有修異常問題,以下是修改方式修改的時候不能使用 root 權限去執行,需切換到 git 權限去執行
- 因在建立帳號的時候就針對該帳號不能有登入權限,因此會建議先修改成登入後在修改回來就可以
vim /etc/passwd
# 修改前
git:x:xxx:xxx::/home/git:/user/sbin/nologin

# 修改後
git:x:xxx:xxx::/home/git:/bin/bash
- 切換過去
git帳號
su git
- 執行資料庫規則修改,要先確認好您的站台
app.ini位置在那
gitea --config /home/git/app.ini doctor convert