
mailcow Proxmox Mail Gateway 接收/傳送
BUBU 前陣在測試怎麼在 mailcow 設定並且先傳送到 Proxmox Mail Gateway 進行過濾後再做傳送,有在官方討論區找到有人分享怎麼設定但沒有說明怎麼做細部設定,本篇會大略說明怎麼做細部設定。
運行環境
環境都是在 「Proxmox VE 」 虛擬系統上架設,都是以 「 LXC 」模式為主,除非有特殊狀況會告知使用 「 VM 」 模式
- 系統環境: Proxmox Mail Gateway(PMG)、mailcow
設定過程
- 有設定頁面會看到
Routing選這個然後在下面輸入您的Proxmox Mail Gateway(PMG)位置如果有改 Port 號記得填上 Port 號
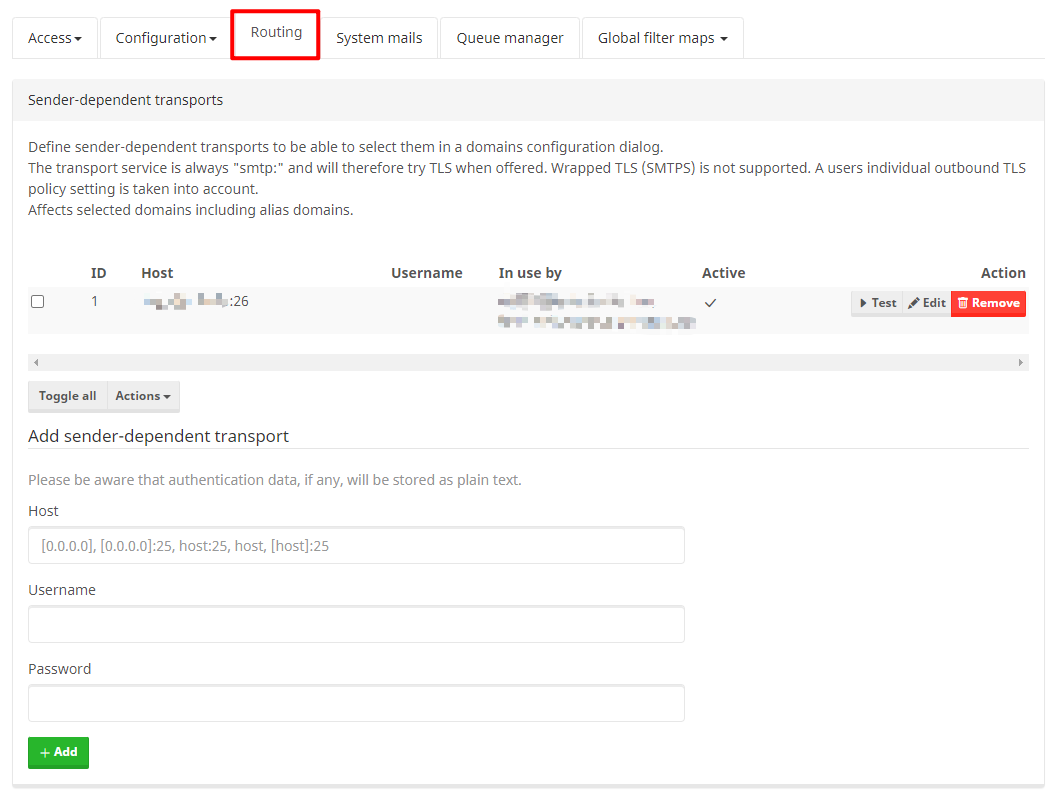
- 新增完後點選
Test測試看看是否信件會經過Proxmox Mail Gateway(PMG)服務再寄出去的,您可以填剛您要寄的帳號及收件位置。
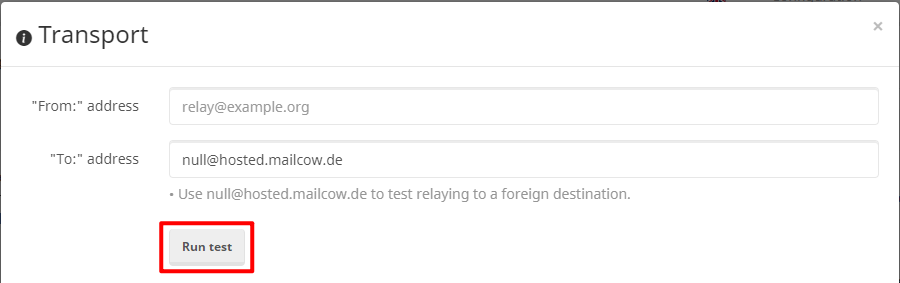
- 寄出後系統會帶出目前的狀況,正常情況下會在您所填寫的收件信箱會收到一封測試信件。

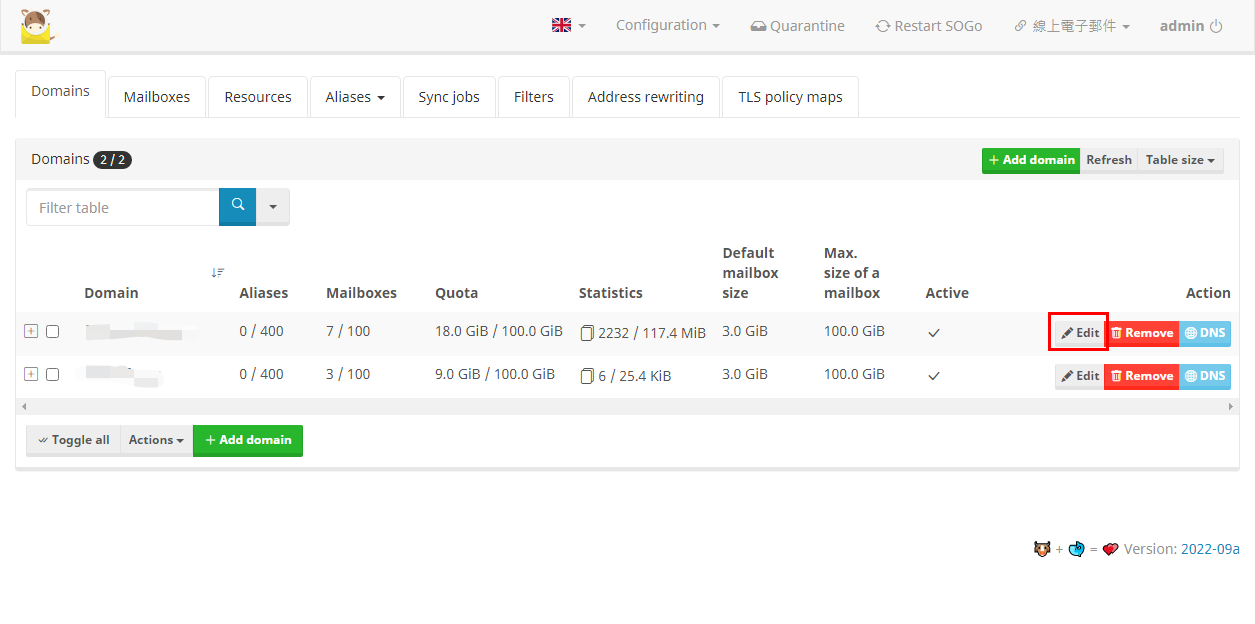
- 方式一、全域帳號都設從
Proxmox Mail Gateway(PMG)檢查後再寄出
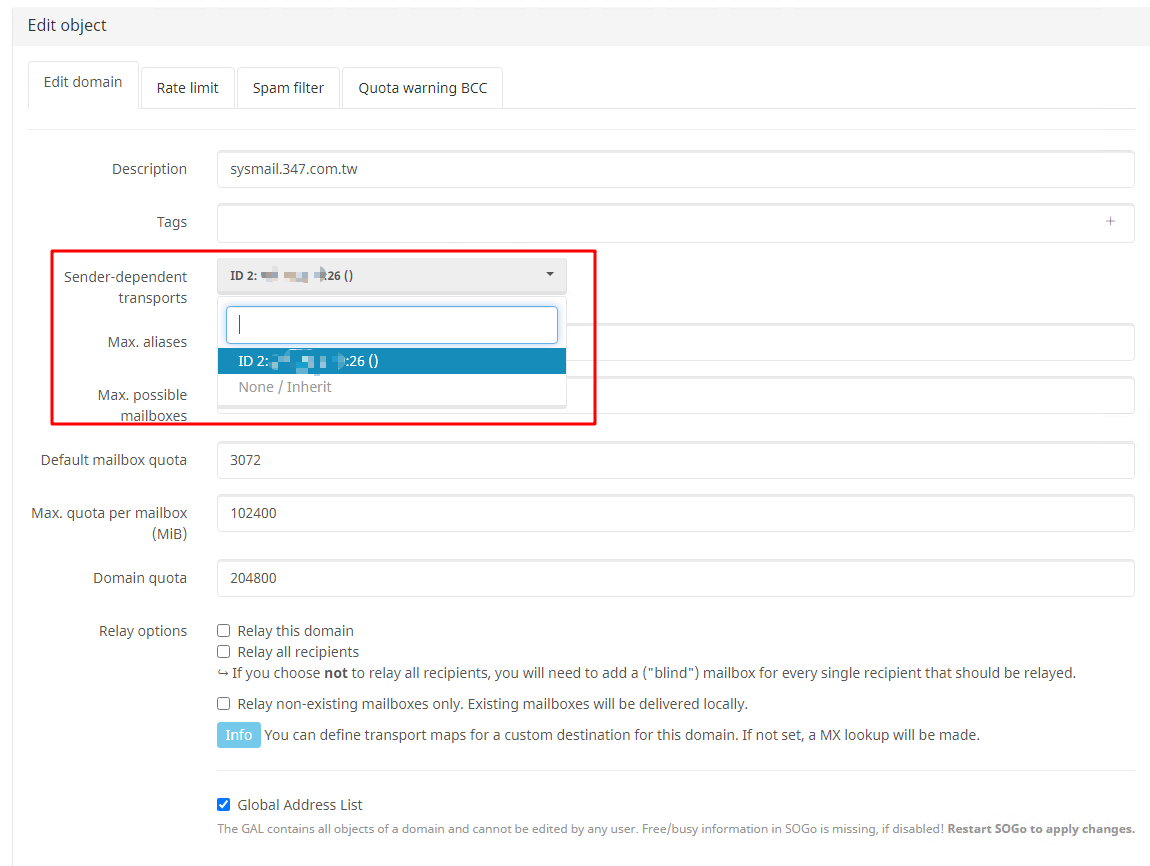
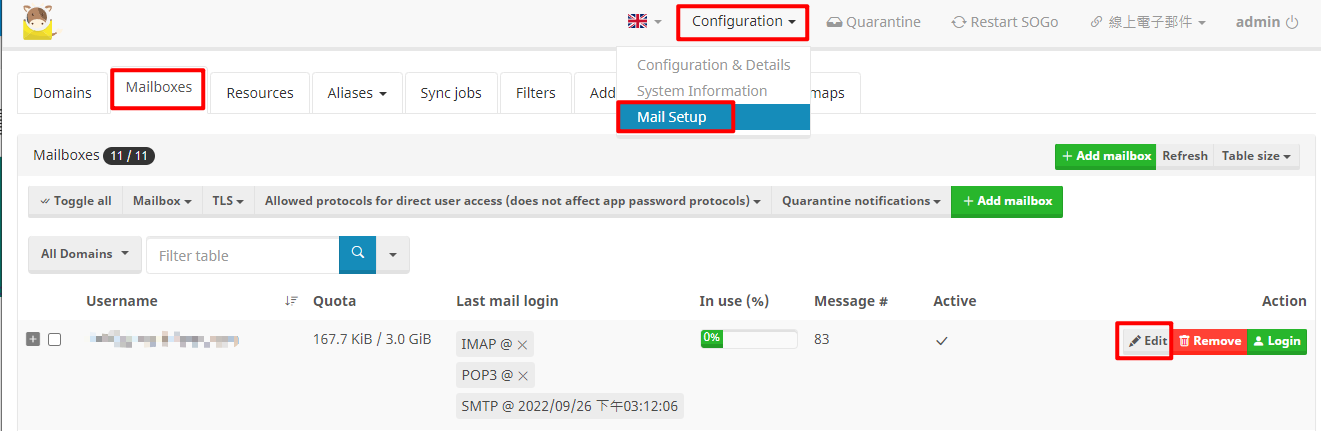
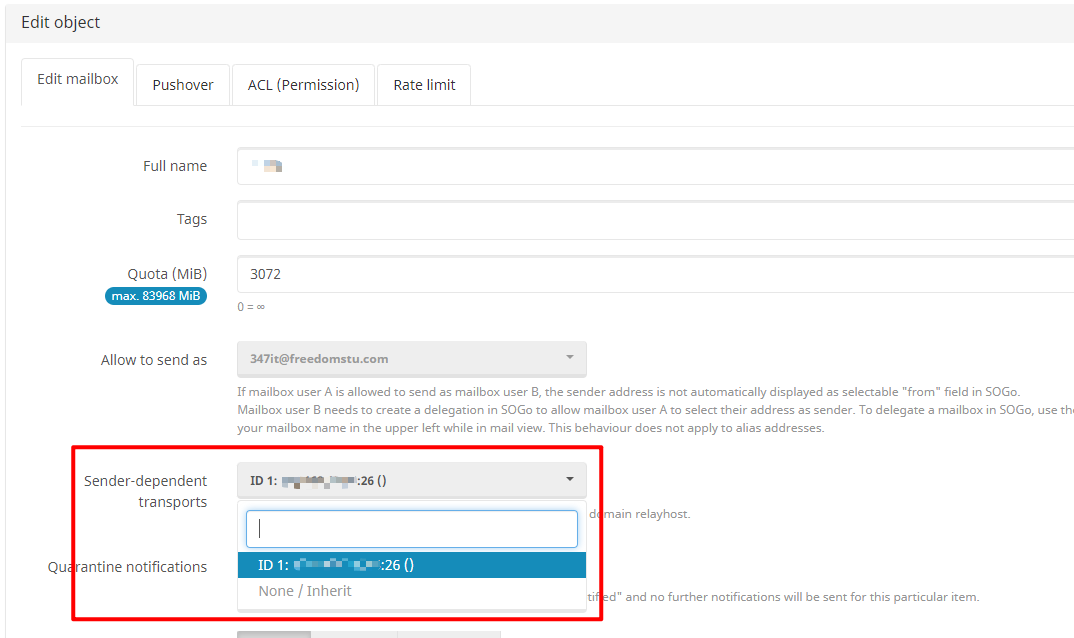
- 點選
Sender-dependent transports選擇Proxmox Mail Gateway(PMG)站台位置
- 方式二、指定帳號設定信件寄出去時要經過
Proxmox Mail Gateway(PMG)檢查再寄出
- 點選
Sender-dependent transports選擇Proxmox Mail Gateway(PMG)站台位置
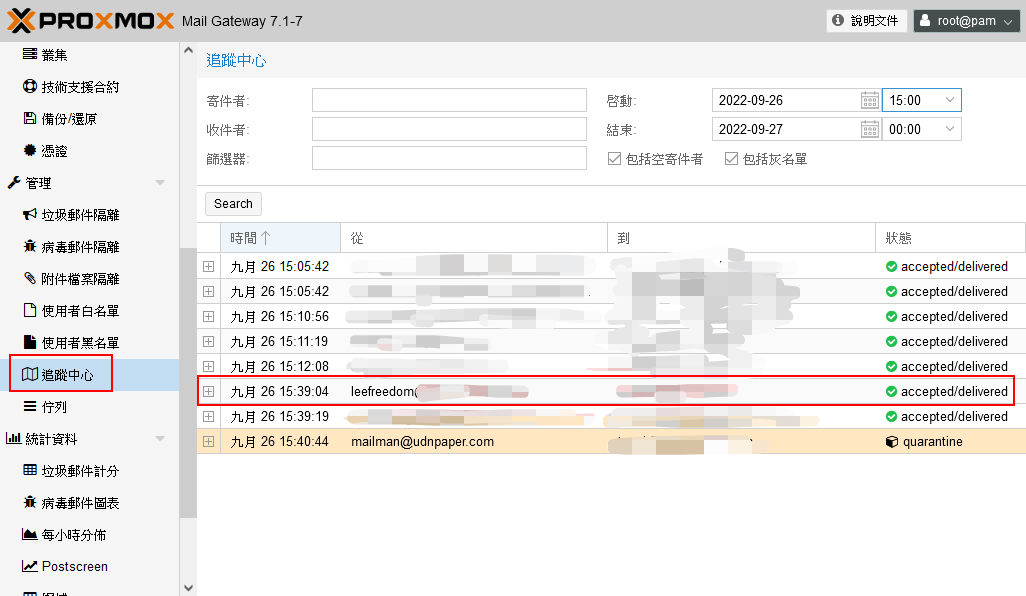
- 以上設定完之後再去該帳號 WEB 線上寄一封信到您想要寄郵件信箱,寄出後就可以從
Proxmox Mail Gateway(PMG)追蹤中心上查看是否有記錄,正常如有經過Proxmox Mail Gateway(PMG)服務會顯示寄出帳號及收信位置
- 在去儀表板頁面上看處理中的郵件流量外寄部份是否有流量出現,如有出現恭喜您設定成功了,接下就可以在
Proxmox Mail Gateway(PMG)服務設定您規則來保護您的郵件伺服器。
