OxOffice Community 線上編輯 Ubuntu 20.04
BUBU 因公司要導入線上協作服務,未來想要把在 Google 慢慢轉移到自己的服務上使用。 OxOffice
社群版功能若沒有辦法符合企業所使用的功能,可以考慮採買商業版的服務來使用
運行環境
環境都是在 「Proxmox VE 」 虛擬系統上架設,都是以 「 LXC 」模式為主,除非有特殊狀況會告知使用 「 VM 」 模式
- 系統環境: Ubuntu 20.04
- Web 服務: Nginx 1.26.2
安裝過程
Nginx
可以參考本工作室的之前寫的文章 Nginx 模組擴充 - Debian \ Ubuntu
OxOffice Community 設定安裝
-
首先到官網 下載 參考安裝流程
-
安裝必要的套件服務
apt install vim openssh-server net-tools curl gnupg2 wget -y
- 匯入
oxool金鑰
curl http://www.oxoffice.com.tw/deb/OSSII-2022.key | sudo apt-key add
- 新增加來源庫
cd /etc/apt/sources.list.d/
wget http://www.oxoffice.com.tw/deb/oxool-community-v4-focal.list
- 安裝
oxool服務
sudo apt update && sudo apt install oxool -y
OxOffice 設定檔
vim /etc/oxool/oxoolwsd.xml

憑證設定
<ssl desc="SSL settings">
        <enable type="bool" desc="Controls whether SSL encryption is enable (do not disable for production deployment). If default is false, must first be compiled with SSL support to enable." default="true">true</enable>
        <termination desc="Connection via proxy where oxoolwsd acts as working via https, but actually uses http." type="bool" default="true">false</termination>
        <cert_file_path desc="Path to the cert file" relative="false">/etc/nginx/ssl/fullchain.pem</cert_file_path> ----修改憑證路徑
        <key_file_path desc="Path to the key file" relative="false">/etc/nginx/ssl/privkey.pem</key_file_path> ----修改憑證路徑
        <ca_file_path desc="Path to the ca file" relative="false"></ca_file_path> ----刪除路徑
        <cipher_list desc="List of OpenSSL ciphers to accept" default="ALL:!ADH:!LOW:!EXP:!MD5:@STRENGTH"></cipher_list>
        <hpkp desc="Enable HTTP Public key pinning" enable="false" report_only="false">
            <max_age desc="HPKP's max-age directive - time in seconds browser should remember the pins" enable="true">1000</max_age>
            <report_uri desc="HPKP's report-uri directive - pin validation failure are reported at this URL" enable="false"></report_uri>
            <pins desc="Base64 encoded SPKI fingerprints of keys to be pinned">
            <pin></pin>
            </pins>
        </hpkp>
    </ssl>

信任網域
<storage desc="Backend storage">
        <filesystem allow="false" />
        <wopi desc="Allow/deny wopi storage. Mutually exclusive with webdav." allow="true">
            <host desc="Regex pattern of hostname to allow or deny." allow="true">localhost</host>
            <host desc="Regex pattern of hostname to allow or deny." allow="true">nc\.xxx\.com</host> #增加您的hostname或是IP,這個IP或是hostname是WOPI Server(也就是Nextcloud的所在IP)
            <host desc="Regex pattern of hostname to allow or deny." allow="true">192\.168\.[0-9]{1,3}\.[0-9]{1,3}</host>
            <host desc="Regex pattern of hostname to allow or deny." allow="false">192\.168\.1\.1</host>

            <max_file_size desc="Maximum document size in bytes to load. 0 for unlimited." type="uint">0</max_file_size>
        </wopi>
        <webdav desc="Allow/deny webdav storage. Mutually exclusive with wopi." allow="false">
            <host desc="Hostname to allow" allow="false">localhost</host>
        </webdav>
    </storage>

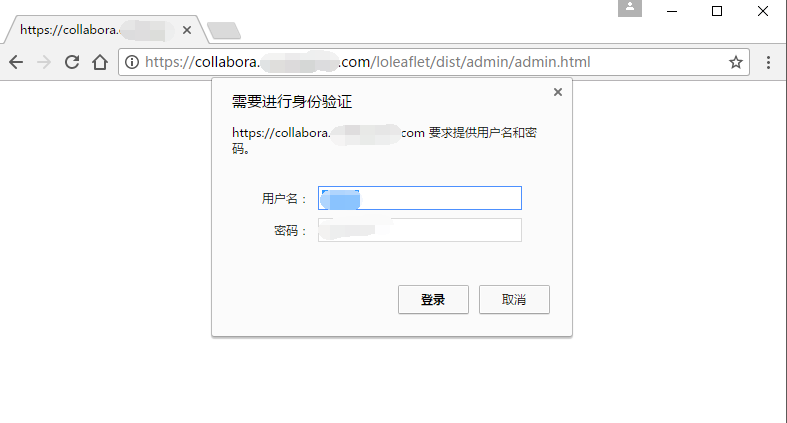
網頁管理者帳號設定
    <admin_console desc="Web admin console settings.">
        <enable desc="Enable the admin console functionality" type="bool" default="true">true</enable>
        <enable_pam desc="Enable admin user authentication with PAM" type="bool" default="false">false</enable_pam>
        <username desc="The username of the admin console. Ignored if PAM is enabled.">username</username>
        <password desc="The password of the admin console. Deprecated on most platforms. Instead, use PAM or loolconfig to set up a secure password.">password</password>
    </admin_console>
- 設定完重啟服務
systemctl restart oxool && systemctl enable oxool
or
systemctl enable oxool --now
- 確認服務是否正常啟用
netstat -tlnp
- 如正常啟動會有如下圖
Nginx 設定檔
全域設定
user www-data;
worker_processes auto;
error_log /var/log/nginx/error.log;
pid /run/nginx.pid;
include /usr/share/nginx/modules/*.conf;
#
events {
    worker_connections 1024;
}
#
http {
    log_format main  '$remote_addr - $remote_user [$time_local] "$request" '
                      '$status $body_bytes_sent "$http_referer" '
                      '"$http_user_agent" "$http_x_forwarded_for"';
#
    access_log /var/log/nginx/access.log  main;
#
    server_tokens off;
#
# Default is 60, May need to be increased for very large uploads
#
    sendfile on;
#
    tcp_nopush on;
    tcp_nodelay on;
    keepalive_timeout 65;
    types_hash_max_size 2048;
# set max upload size
    client_max_body_size 512M;
    fastcgi_buffers 64 4K;
# Enable gzip but do not remove ETag headers
    gzip on;
    gzip_vary on;
    gzip_comp_level 4;
    gzip_min_length 256;
    gzip_proxied expired no-cache no-store private no_last_modified no_etag auth;
    gzip_types application/atom+xml application/javascript application/json application/ld+json application/manifest+json application/rss+xml application/vnd.geo+json application/vnd.ms-fontobject application/x-font-ttf application/x-web-app-manifest+json application/xhtml+xml application/xml font/opentype image/bmp image/svg+xml image/x-icon text/cache-manifest text/css text/plain text/vcard text/vnd.rim.location.xloc text/vtt text/x-component text/x-cross-domain-policy;
#
    include /etc/nginx/mime.types;
    include /etc/nginx/conf.d/*.conf;
#
    default_type application/octet-stream;
}
服務設定
server {
    listen 80;
    server_name 您的連線站台;
    rewrite ^(.*)$ https://${server_name}$1 permanent;
}
#
server {
    listen 443 ssl;
    http2 on;
    listen [::]:443 ssl;
    server_name 您的連線站台;
    #
    # certs sent to the client in SERVER HELLO are concatenated in ssl_certificate
    #
    ssl_certificate /etc/nginx/ssl/fullchain.pem;
    ssl_certificate_key /etc/nginx/ssl/privkey.pem;
    ssl_session_timeout 1d;
    ssl_session_cache shared:SSL:50m;
    ssl_session_tickets off;
    #
    # intermediate configuration. tweak to your needs.
    #
    ssl_protocols TLSv1.3 TLSv1.2;
    ssl_ciphers ECDHE-ECDSA-AES128-GCM-SHA256:ECDHE-RSA-AES128-GCM-SHA256:ECDHE-ECDSA-AES256-GCM-SHA384:ECDHE-RSA-AES256-GCM-SHA384:ECDHE-ECDSA-CHACHA20-POLY1305:ECDHE-RSA-CHACHA20-POLY1305:DHE-RSA-AES128-GCM-SHA256:DHE-RSA-AES256-GCM-SHA384:DHE-RSA-CHACHA20-POLY1305;
    ssl_prefer_server_ciphers on;
    ssl_stapling on;
    ssl_stapling_verify on;
    #
    access_log /var/log/nginx/oc_access.log;
    error_log /var/log/nginx/oc_error.log;
    #
    client_max_body_size 1G;
    fastcgi_buffers 64 4K;
    #
    # Static files
    location ^~ /loleaflet {
        proxy_pass https://127.0.0.1:9980;
        proxy_set_header Host $http_host;
    }

    # WOPI discovery URL
    location ^~ /hosting/discovery {
        proxy_pass https://127.0.0.1:9980;
        proxy_set_header Host $http_host;
    }

    # Capabilities
    location ^~ /hosting/capabilities {
        proxy_pass https://localhost:9980;
        proxy_set_header Host $http_host;
    }

    # Main websocket
    location ~ ^/lool/(.*)/ws$ {
        proxy_pass https://127.0.0.1:9980;
        proxy_set_header Upgrade $http_upgrade;
        proxy_set_header Connection "Upgrade";
        proxy_set_header Host $http_host;
        proxy_read_timeout 36000s;
    }

    # Download, presentation and image upload
    location ~ ^/lool {
        proxy_pass https://127.0.0.1:9980;
        proxy_set_header Host $http_host;
    }

    # Admin Console websocket
    location ^~ /lool/adminws {
        proxy_pass https://127.0.0.1:9980;
        proxy_set_header Upgrade $http_upgrade;
        proxy_set_header Connection "Upgrade";
        proxy_set_header Host $http_host;
        proxy_read_timeout 36000s;
    }

    # 可以自行查看是否有安裝看成功,如果有會顯示 ok ,如果有對外公開的話會建議在這裡限制來源的 ip
    location / {
        allow 127.0.0.1;
        deny all;
        proxy_pass https://127.0.0.1:9980;
    }
}
代理設定
server {
    listen 80;
    server_name 您的網域;
    rewrite ^(.*)$ https://${server_name}$1 permanent;
}
#
server {
# 使用 https 和 http/2 協定
    listen 443 ssl;
    http2 on;
# 上述的 IPv6 方式
    listen [::]:443;
    server_name 您的網域;
#
# certs sent to the client in SERVER HELLO are concatenated in ssl_certificate
#
# SSL 憑證證書路徑
    ssl_certificate /etc/nginx/ssl/fullchain.pem;
# 私鑰路徑
    ssl_certificate_key /etc/nginx/ssl/privkey.pem;
# 緩存有效期
    ssl_session_timeout 1d;
# 緩存憑證類型和大小
    ssl_session_cache shared:SSL:50m;
#
# intermediate configuration. tweak to your needs.
#
# 使用的加密協定
    ssl_protocols TLSv1.3 TLSv1.2;
    ssl_ciphers ECDHE-ECDSA-AES128-GCM-SHA256:ECDHE-RSA-AES128-GCM-SHA256:ECDHE-ECDSA-AES256-GCM-SHA384:ECDHE-RSA-AES256-GCM-SHA384:ECDHE-ECDSA-CHACHA20-POLY1305:ECDHE-RSA-CHACHA20-POLY1305:DHE-RSA-AES128-GCM-SHA256:DHE-RSA-AES256-GCM-SHA384:DHE-RSA-CHACHA20-POLY1305;
# 交握過程使用 Server 的首選加演算法,這裡使用 Client 為首選
    ssl_prefer_server_ciphers on;
#
    access_log /var/log/nginx/oc_access.log;
    error_log /var/log/nginx/oc_error.log;
#
  # Static files
  location ^~ /loleaflet {
    proxy_pass https://您的服務主機:9980;
    proxy_set_header Host $http_host;
  }

  # WOPI discovery UR
  location ^~ /hosting/discovery {
    proxy_pass https://您的服務主機:9980;
    proxy_set_header Host $http_host;
  }

  # Capabilities
  location ^~ /hosting/capabilities {
    proxy_pass https://您的服務主機:9980;
    proxy_set_header Host $http_host;
  }

  # Main websocket
  location ~ ^/lool/(.*)/ws$ {
    proxy_pass https://您的服務主機:9980;
    proxy_set_header Upgrade $http_upgrade;
    proxy_set_header Connection "Upgrade";
    proxy_set_header Host $http_host;
    proxy_read_timeout 36000s;
  }

  # Download, presentation and image upload
  location ~ ^/lool {
    proxy_pass https://您的服務主機:9980;
    proxy_set_header Host $http_host;
  }

  # Admin Console websocket
  location ^~ /lool/adminws {
    proxy_pass https://您的服務主機:9980;
    proxy_set_header Upgrade $http_upgrade;
    proxy_set_header Connection "Upgrade";
    proxy_set_header Host $http_host;
    proxy_read_timeout 36000s;
  }

  # 可以自行查看是否有安裝看成功,如果有會顯示 ok ,如果有對外公開的話會建議在這裡限制來源的 ip
   location /{
   	allow 127.0.0.1;
    deny all;
    proxy_pass https://您的服務主機:9980;
  }
}


