
Redmine 開源專案管理 - Debian / Ubuntu
BUBU 因為看了一本是用 Redmine 專案方式來處理有關於資訊人員在 MIS 上面管理事務記錄,之前有花點時間去架設這一套結果失敗,那後來沒有時間最近剛好想到再重新測試已有架設成功,記錄一下安裝過程。
2024.06.15 更新 Redmine 的版本、Nginx 修改安裝方式及設定檔、新增加 Redmine 啟動服務
運行環境
環境都是在 「Proxmox VE 」 虛擬系統上架設,都是以 「 LXC 」模式為主,除非有特殊狀況會告知使用 「 VM 」 模式
- 系統環境: Debian 12、Ubuntu 2204
- Web 服務: Nginx 1.22.1
- 資料庫服務: MariaDB 10.6、10.11
安裝過程
前置處理
- 安裝必要套件
apt install build-essential ruby-dev libxslt1-dev libmariadb-dev gnupg2 bison libbison-dev libgdbm-dev libncurses-dev libncurses5-dev libxml2-dev zlib1g-dev imagemagick libmagickwand-dev libreadline-dev libssl-dev libyaml-dev libsqlite3-dev sqlite3 -y
- 建立
Redmine專用系統帳號
useradd -r -m -d /opt/redmine -s /bin/bash redmine
- 讓
Redmine新增加到www-data群組有權限可以執行
usermod -aG redmine www-data
資料庫
- 安裝資料庫,用系統所提供資料庫版即可
apt install mariadb-server -y
- 啟用資料庫服務
sudo systemctl enable --now mariadb
- 設定管理者密碼
mariadb-secure-installation
-
設定使用
root帳號可以免密碼就可以登入修正方式請參考本篇進行修改 MariaDB root 可空白登入 -
設定
redmin資料表
CREATE DATABASE redminedb;
GRANT ALL on redminedb.* to redmineuser@localhost identified by 'password';
FLUSH PRIVILEGES;
exit;
安裝 Redmine 服務
- 下載目前官方最新版本,BUBU 所安裝版本是 5.1.3 版 官方載點
wget https://www.redmine.org/releases/redmine-5.1.3.tar.gz
- 解壓剛剛下載好的壓縮檔並且放置到
/opt目錄下
tar -xzvf redmine-5.1.3.tar.gz -C /opt/redmine/ --strip-components=1
- 設定權限
chown -R redmine: /opt/redmine/
- 切換帳號到
redmine
su - redmine
- 複製預設的設定檔
cp -a /opt/redmine/config/configuration.yml{.example,}
cp -a /opt/redmine/config/database.yml{.example,}
cp -a /opt/redmine/public/dispatch.fcgi{.example,}
- 設定資料庫連線資訊
vim /opt/redmine/config/database.yml設定完後就存檔離開
production:
  adapter: mysql2
  # 連線資料庫名稱
  database: redminedb
  # 連線資料庫位置
  host: localhost
  # 連線資料庫帳號
  username: redmineuser
  # 連線資料庫密碼
  password: "passwd"
  # Use "utf8" instead of "utfmb4" for MySQL prior to 5.7.7
  encoding: utf8mb4
  variables:
    # Recommended `transaction_isolation` for MySQL to avoid concurrency issues is
    # `READ-COMMITTED`.
    # In case of MySQL lower than 8, the variable name is `tx_isolation`.
    # See https://www.redmine.org/projects/redmine/wiki/MySQL_configuration
    # transaction_isolation: "READ-COMMITTED" <<< 這是預設的參數,上面的說明有說這是 from mysql 8 用,那由於 BUBU 是用 MariaDB 因此需要把這個預設參數註解新增加下面的參數,在執行安裝時候才不會出現錯誤訊息。
    tx_isolation: "READ-COMMITTED"
-
退出該帳號回到 root 或其他帳號繼續操作
-
進到
redmine目錄並且開始安裝服務
cd /opt/redmine && gem install bundler
-
再次切換到
redmine帳號操作 -
開始安裝
redmine服務
bundle config set --local path 'vendor/bundle'
bundle install
bundle update
- 建立金鑰及資料庫服務
bundle exec rake generate_secret_token
RAILS_ENV=production bundle exec rake db:migrate
- 設定預設的資料並且將語系設定為中文
RAILS_ENV=production REDMINE_LANG=zh-TW bundle exec rake redmine:load_default_data
- 啟動服務測試站台連線
bundle exec rails server -e production
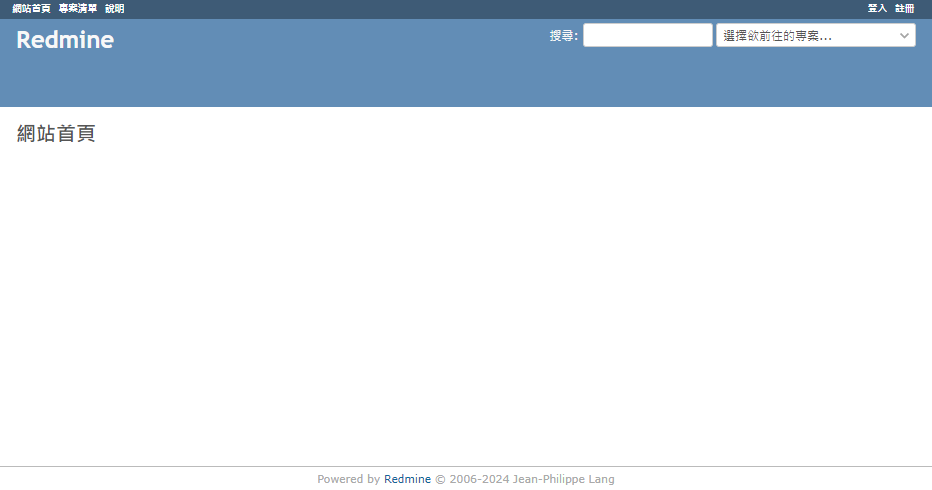
- 開啟網頁輸入您的站台位置
http://連線位置:3000,正常會出現畫面,登入的預設帳密都是admin登入後系統會要求您更換密碼您在自行輸入密碼即可,確認沒有問題開始安裝 web 服務
Redmine 啟動服務
- 新增啟動服務腳本
vim /opt/redmine/config/puma.rb
#!/usr/bin/env puma

# 設定 Redmine 程式放置路徑
application_path = '/opt/redmine'
directory application_path
environment 'production'
# daemonize true
pidfile "#{application_path}/tmp/pids/redmine.pid"
state_path "#{application_path}/tmp/pids/redmine.state"
stdout_redirect "#{application_path}/log/redmine.stdout.log", "#{application_path}/log/redmine.stderr.log"
bind "unix://#{application_path}/tmp/sockets/redmine.sock"
- 新增加
Redmine啟動服務vim /etc/systemd/system/redmine.service
[Unit]
Description=Rails-Puma Webserver

[Service]
Type=simple
# 確認執行權限
User=redmine
# 確認 Redmine 程式放置路徑
WorkingDirectory=/opt/redmine
ExecStart=/bin/bash -lc 'bundle exec puma -C config/puma.rb'
TimeoutSec=15
Restart=always

[Install]
WantedBy=multi-user.target
- 設定開機自動啟動服務
sudo systemctl daemon-reload && sudo systemctl enable --now redmine
安裝 Nginx 服務
-
參考本站所編寫記錄 Nginx 模組擴充 - Debian \ Ubuntu
-
新增
Redmine設定檔vim /etc/nginx/conf.d/redmine.conf
upstream app {
	server unix:/opt/redmine/tmp/sockets/redmine.sock fail_timeout=0;
}
#
server {
	listen 80 default_server;
	listen [::]:80 default_server;
	server_name 連線站台名稱;
	rewrite ^(.*)$ https://${server_name}$1 permanent;
}
#
server {
	# 使用 https 和 http/2 協定
	listen 443 ssl default_server;
	http2 on;
	# 上述的 IPv6 方式
	listen [::]:443 ssl default_server;
	server_name 連線站台名稱;
	#
	root /opt/redmine/public;
	#
	# certs sent to the client in SERVER HELLO are concatenated in ssl_certificate
	#
	# SSL 憑證證書路徑
	ssl_certificate /etc/nginx/ssl/fullchain.pem;
	# 私鑰路徑
	ssl_certificate_key /etc/nginx/ssl/privkey.pem;
	# 緩存有效期
	ssl_session_timeout 1d;
	# 緩存憑證類型和大小
	ssl_session_cache shared:SSL:50m;
	#
	# intermediate configuration. tweak to your needs.
	#
	# 使用的加密協定
	ssl_protocols TLSv1.2 TLSv1.3;
	# 加密演算法,越前面的優先級越高
	ssl_ciphers ECDHE-ECDSA-AES128-GCM-SHA256:ECDHE-RSA-AES128-GCM-SHA256:ECDHE-ECDSA-AES256-GCM-SHA384:ECDHE-RSA-AES256-GCM-SHA384:ECDHE-ECDSA-CHACHA20-POLY1305:ECDHE-RSA-CHACHA20-POLY1305:DHE-RSA-AES128-GCM-SHA256:DHE-RSA-AES256-GCM-SHA384:DHE-RSA-CHACHA20-POLY1305;
	# 交握過程使用 Server 的首選加演算法,這裡使用 Client 為首選
	ssl_prefer_server_ciphers on;
	#
	access_log /var/log/nginx/redmine_access.log;
	error_log /var/log/nginx/redmine_error.log;
	#
	try_files $uri/index.html $uri @app;
	#
	location @app {
		proxy_pass http://app;
		proxy_set_header X-Forwarded-For $proxy_add_x_forwarded_for;
		proxy_set_header Host $http_host;
		proxy_redirect off;
	}
	error_page 500 502 503 504 /500.html;
	client_max_body_size 4G;
	keepalive_timeout 10;
}
- 確認設定檔是否正常,如沒有問題就再次重啟服務
nginx -t && sudo systemctl restart nginx
- 測試網頁是否可以正常連線,如連線成功會顯示跟下面一樣圖片
補充說明
LDAP串接設定
BUBU 因為公司有架設 UCS 服務來做帳號統一管理設定如下
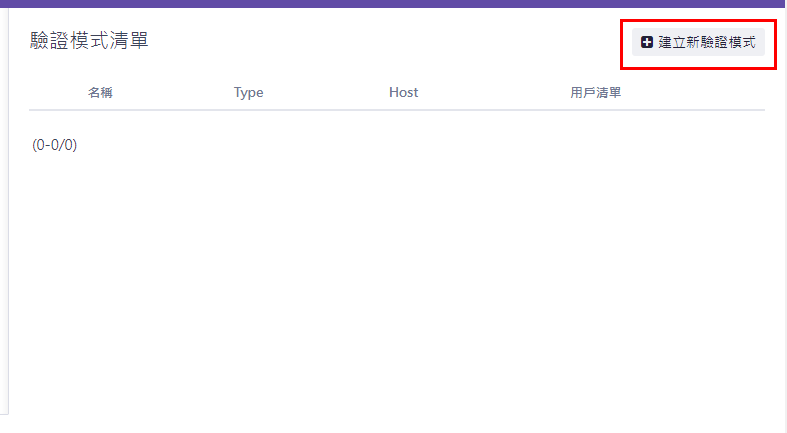
- 進後台選擇 LDAP驗證

- 畫面右上面有一個按鈕
建立新驗證模式
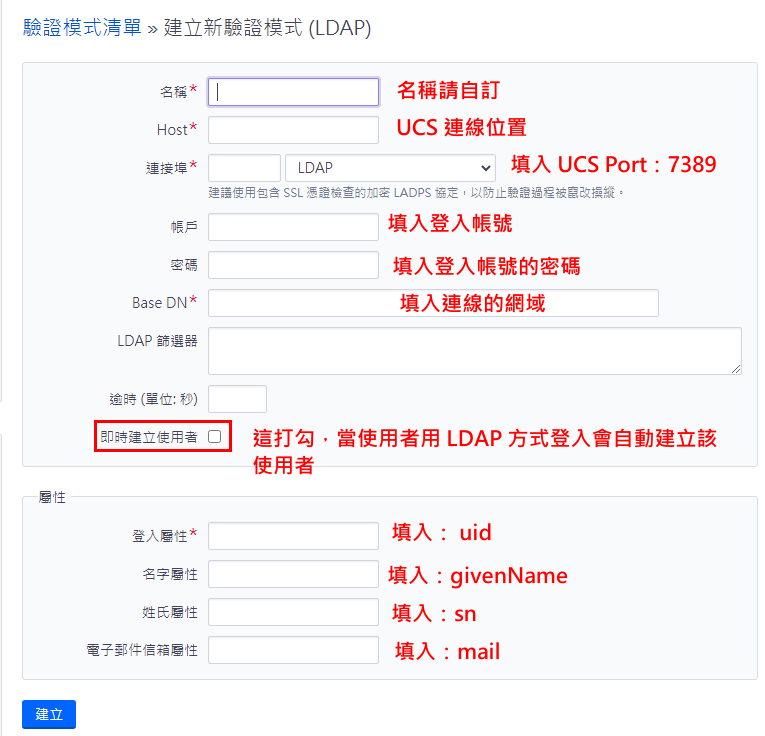
- 設定 LDAP 連線資訊
- 帳戶:
uid=管理者,cn=users,dc=abc,dc=local - Base DN:
ou=組織,dc=abc,dc=local - LDAP篩選器:
(&(|(objectclass=person)(objectclass=uidObject))(|(memberof=cn=群組,ou=組織,dc=abc,dc=local))) - 登入屬性:
uid - 名字屬性:
givenName - 姓字屬性:
sn - 電子郵件信箱屬性:
mail
- 帳戶:
SMTP串接設定
-
設定
SMTP連線資訊vim /opt/redmine/config/configuration.yml -
複制設定檔預設的設定檔參數到
production這下面
production:

# ==== SMTP server at example.com using LOGIN authentication and checking HELO for foo.com

  email_delivery:
    delivery_method: :smtp
    smtp_settings:
      # 使用 587 port 需要這個參數
      enable_starttls_auto: true
      # 修改 SMTP 連線位置
      address: "example.com"
      port: 587
      authentication: :login
      # 修改 SMTP 連線位置
      domain: 'example.com'
      # 填入登入帳號
      user_name: 'myaccount'
      # 填入該帳號的密碼
      password: 'password'
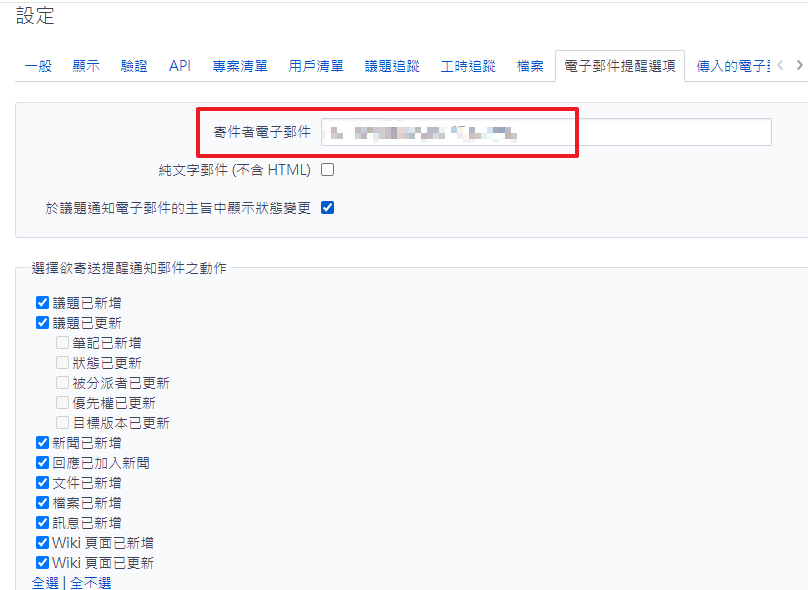
- 進後台設定電子郵件,修改寄件者資訊並且存檔,要確認是否有正常收到信件右下面有一個
寄送測試郵件按鈕可用
語系檔置
- 如果要修改的語系檔的話路徑在
/redmine/config/locales這下面
移除套件方式
- 以下是移除套件的指令切換到
su - redmine
bundle exec rake redmine:plugins:migrate NAME=plugin_name VERSION=0 RAILS_ENV=production
- 刪除已移除的套件
rm -rf plugins/plugin_name
- 重啟
redmian服務
systemctl restart redmian
備註
以下套件是小弟我還沒有時間測或者可能當下還沒有需先留著備用
- 讓使用者可自行修改主題 Redmine Theme Changer Plugin
- 限制可以連線站以來源 Redmine IP Filter
- 程式碼審查 Redmine Code Review Plugin
- 即時修改或者自訂欄位名稱 redmine_issue_dynamic_edit
- 類示看板套件 Redmine Issues Panel
- 日曆套件 mega_calendar