OpenVAS 弱點掃描 安裝流程
因近期越來越來資安的問題,那由於公司的沒有什麼預算在這上面,因此在節省哥簡報裡面有看到該開源的軟體,記錄安裝
環境:
系統:CentOS 7
OpenVAS 安裝
安裝需要的套件
yum install -y wget bzip2 texlive net-tools alien gnutls-utils新增來源庫
從 Atomic Secured for Linux 免費的 Atomicorp 存儲庫,增加到 repo 來源庫
wget -q -O - https://www.atomicorp.com/installers/atomic | sh執行畫面如下,都預設即可,直接按 Enter 鍵就可以
Atomic Free Unsupported Archive installer, version 5.0

BY INSTALLING THIS SOFTWARE AND BY USING ANY AND ALL SOFTWARE
PROVIDED BY ATOMICORP LIMITED YOU ACKNOWLEDGE AND AGREE:

THIS SOFTWARE AND ALL SOFTWARE PROVIDED IN THIS REPOSITORY IS
PROVIDED BY ATOMICORP LIMITED AS IS, IS UNSUPPORTED AND ANY
EXPRESS OR IMPLIED WARRANTIES, INCLUDING, BUT NOT LIMITED TO, THE
IMPLIED WARRANTIES OF MERCHANTABILITY AND FITNESS FOR A PARTICULAR
PURPOSE ARE DISCLAIMED. IN NO EVENT SHALL ATOMICORP LIMITED, THE
COPYRIGHT OWNER OR ANY CONTRIBUTOR TO ANY AND ALL SOFTWARE PROVIDED
BY OR PUBLISHED IN THIS REPOSITORY BE LIABLE FOR ANY DIRECT,
INDIRECT, INCIDENTAL, SPECIAL, EXEMPLARY, OR CONSEQUENTIAL DAMAGES
(INCLUDING, BUT NOT LIMITED TO, PROCUREMENT OF SUBSTITUTE GOODS
OR SERVICES; LOSS OF USE, DATA, OR PROFITS; OR BUSINESS INTERRUPTION)
HOWEVER CAUSED AND ON ANY THEORY OF LIABILITY, WHETHER IN CONTRACT,
STRICT LIABILITY, OR TORT (INCLUDING NEGLIGENCE OR OTHERWISE)
ARISING IN ANY WAY OUT OF THE USE OF THIS SOFTWARE, EVEN IF ADVISED
OF THE POSSIBILITY OF SUCH DAMAGE.

For supported software packages please contact us at:

  [email protected]

Do you agree to these terms? (yes/no) [Default: yes]

Configuring the [atomic] repo archive for this system

Installing the Atomic GPG keys: OK

Downloading atomic-release-1.0-21.el7.art.noarch.rpm: Preparing...
################################# [100%]
Updating / installing...
   1:atomic-release-1.0-21.el7.art    ################################# [100%]
OK

Enable repo by default? (yes/no) [Default: yes]:


The Atomic repo has now been installed and configured for your system
The following channels are available:
  atomic          - [ACTIVATED] - contains the stable tree of ART packages
  atomic-testing  - [DISABLED]  - contains the testing tree of ART packages
  atomic-bleeding - [DISABLED]  - contains the development tree of ART packages
安裝 OpenVAS
更新系統
yum update -y安裝 OpenVAS
yum -y install openvas列出有關於 OpenVAS 清單
yum list | grep openvas列出清單如下:
openvas-scanner.x86_64                   6.0.0-6930.el7.art             @atomic
openvas-smb.x86_64                       1.0.5-6923.el7.art             @atomic
openvas.noarch                           9.0.3-6767.el7.art             atomic
openvas-cli.x86_64                       1.4.5-2739.el7.art             atomic
openvas-cli-debuginfo.x86_64             1.4.5-2739.el7.art             atomic
openvas-libraries.x86_64                 9.0.3-6672.el7.art             atomic
openvas-libraries-debuginfo.x86_64       9.0.3-6672.el7.art             atomic
openvas-libraries-devel.x86_64           9.0.3-6672.el7.art             atomic
openvas-manager.x86_64                   7.0.3-6757.el7.art             atomic
openvas-manager-debuginfo.x86_64         7.0.3-6757.el7.art             atomic
openvas-manager-doc.x86_64               7.0.3-6757.el7.art             atomic
openvas-scanner-debuginfo.x86_64         6.0.0-6930.el7.art             atomic
openvas-smb-debuginfo.x86_64             1.0.2-1980.el7.art             atomic
快速設定 OpenVAS 系統
openvas-setup執行後畫面
Openvas Setup, Version: 4.0.1

Redirecting to /bin/systemctl restart redis.service
Created symlink from /etc/systemd/system/multi-user.target.wants/redis.service to /usr/lib/systemd/system/redis.service.

Step 1: Update NVT, CERT, and SCAP data
Please note this step could take some time.
Once completed, this will be updated automatically every 24 hours

Select download method

  * wget (NVT download only)
  * curl (NVT download only)
  * rsync

  Note: If rsync requires a proxy, you should define that before this step.

Downloader [Default: rsync] (按下Enter)

(中間略過,會下載及安裝一堆)

Step 2: Choose the GSAD admin users password.
The admin user is used to configure accounts,
Update NVT's manually, and manage roles.

Enter administrator username [Default: admin] : (按下Enter)
Enter Administrator Password: (設定密碼)
Verify Administrator Password: (再次輸入密碼)

Setup complete, you can now access GSAD at:
  https://<IP>:9392

rngd: no process found
Redirecting to /bin/systemctl restart gsad.service
Created symlink from /etc/systemd/system/multi-user.target.wants/openvas-scanner.service to /usr/lib/systemd/system/openvas-scanner.service.
Created symlink from /etc/systemd/system/openvas-manager.service to /usr/lib/systemd/system/gvmd.service.
Created symlink from /etc/systemd/system/multi-user.target.wants/gvmd.service to /usr/lib/systemd/system/gvmd.service.
Created symlink from /etc/systemd/system/multi-user.target.wants/gsad.service to /usr/lib/systemd/system/gsad.service.
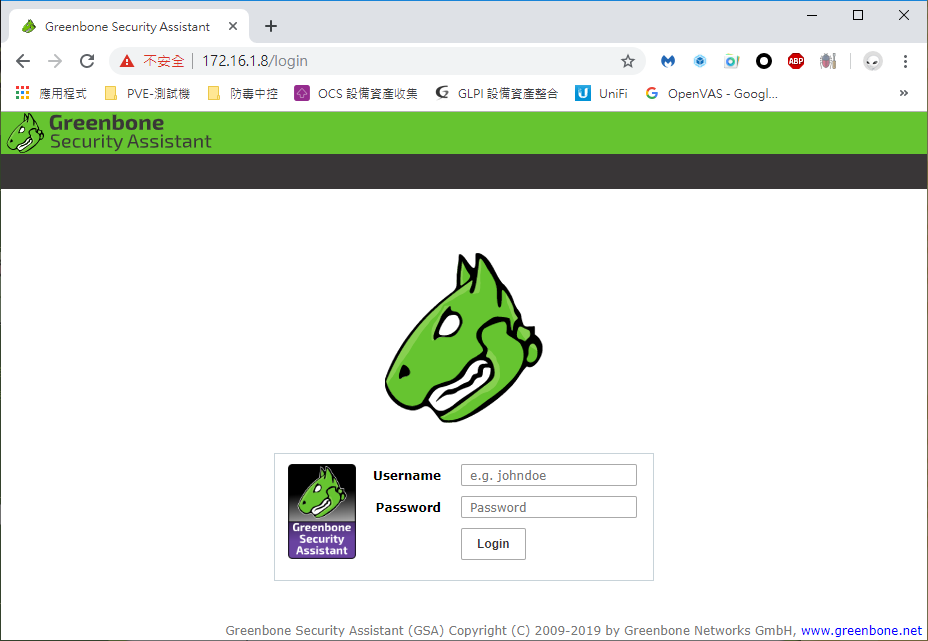
開啟瀏灠器,在網址上輸入 https://<IP>
在 username:預設為 admin 、Password:就是剛剛您所輸入的密碼
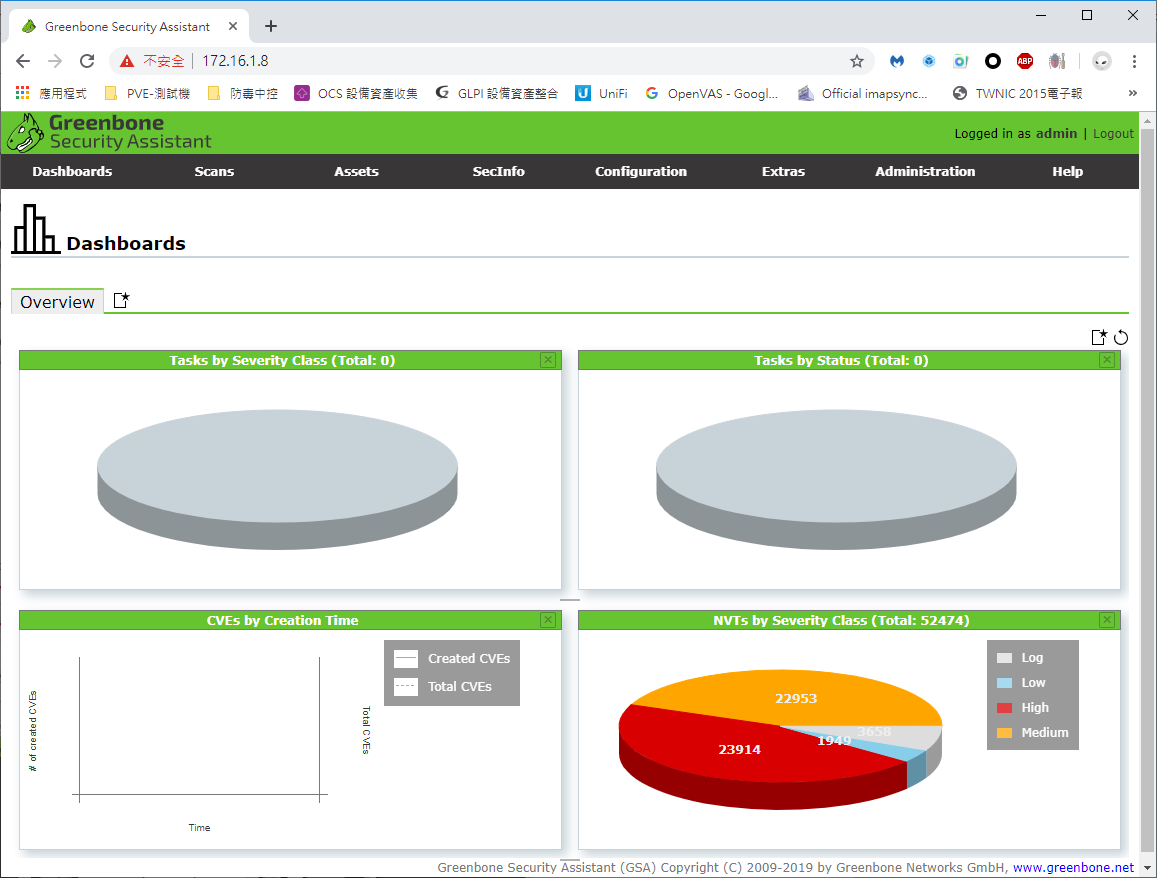
以下是登入成功的畫面
基本單簡操作
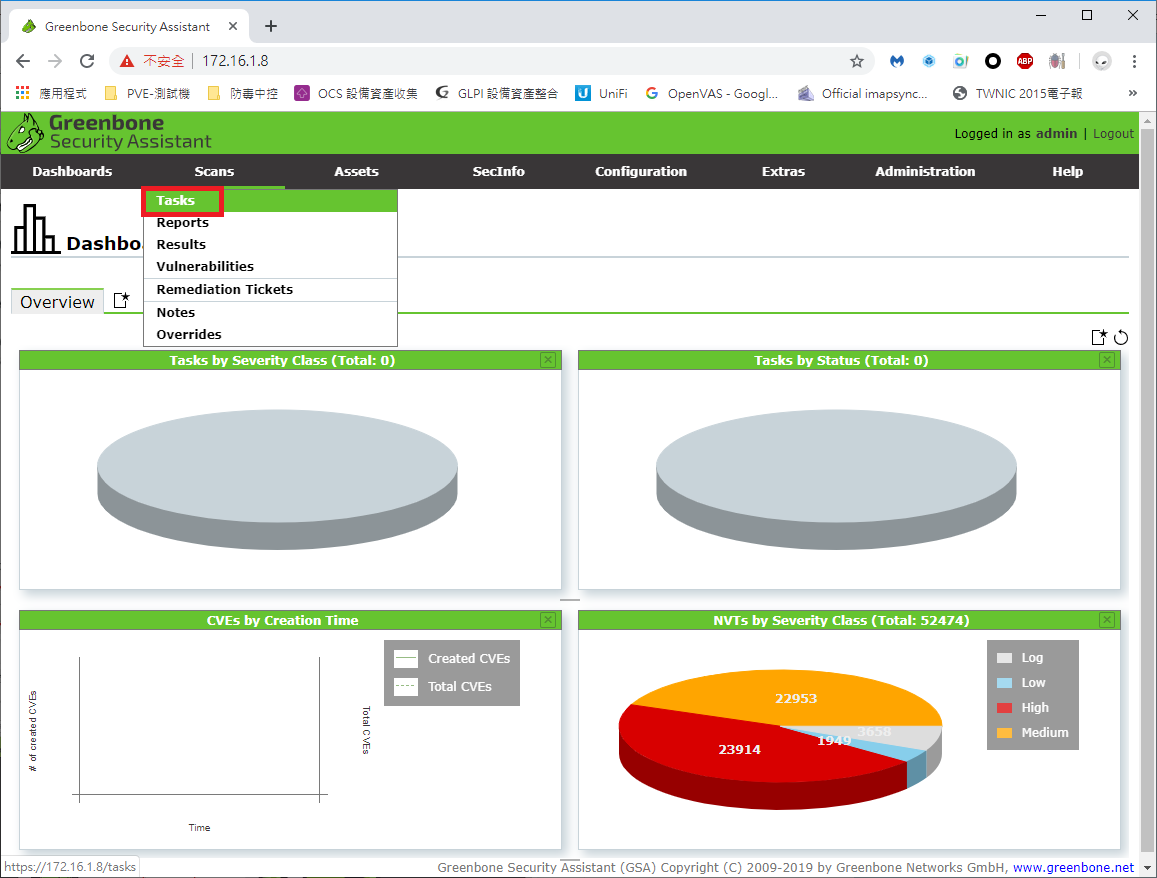
新增加要掃描設備,選擇畫面上方選項是「 Scans 」按下「 Tasks 」
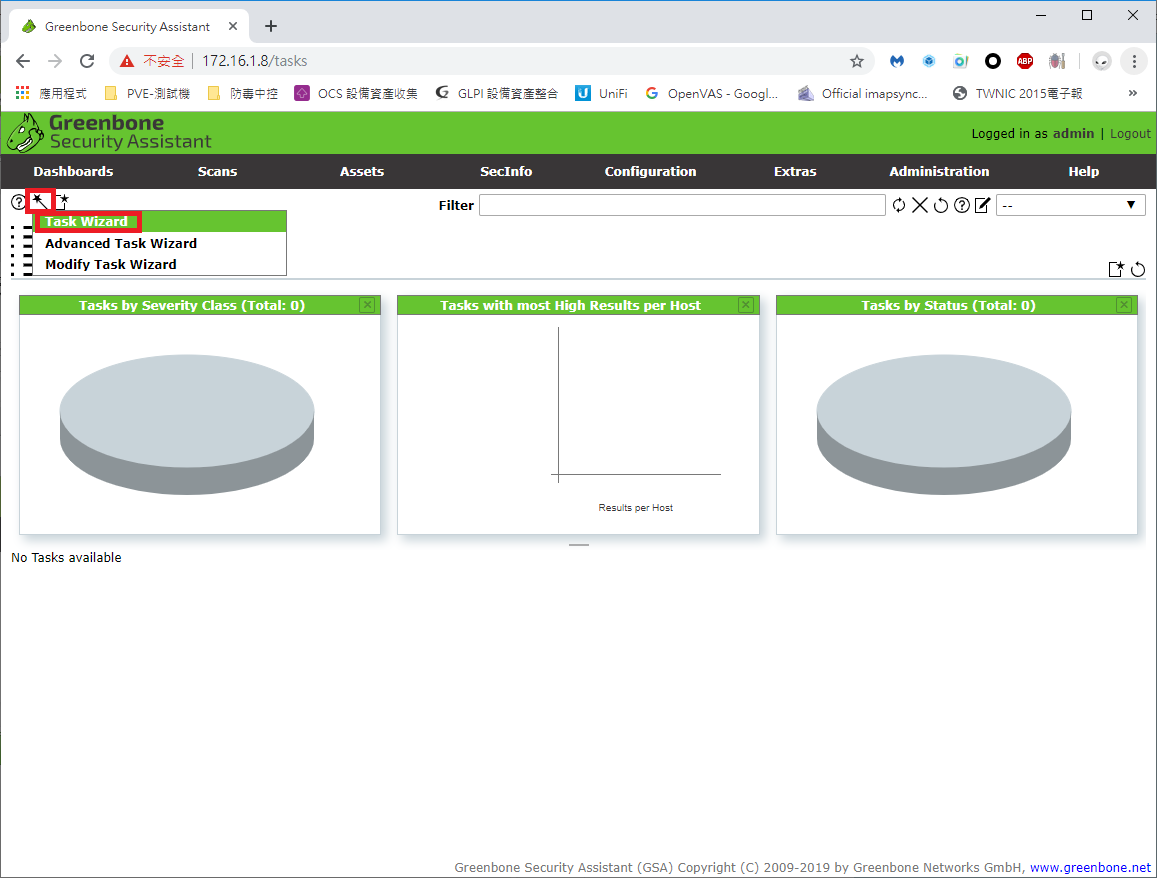
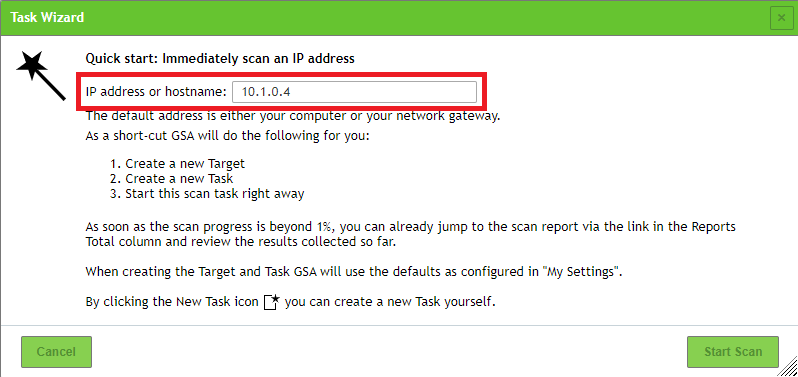
進入後的畫面,在畫面左上角有一個精靈棒圖示,選擇「 Task Wizard 」
在 IP address or hostname 這個欄位填入,所要掃描的設備,之後再按下「 Start Scan 」按鍵
按完後會在畫面上看到該設備目前的進度是怎樣子
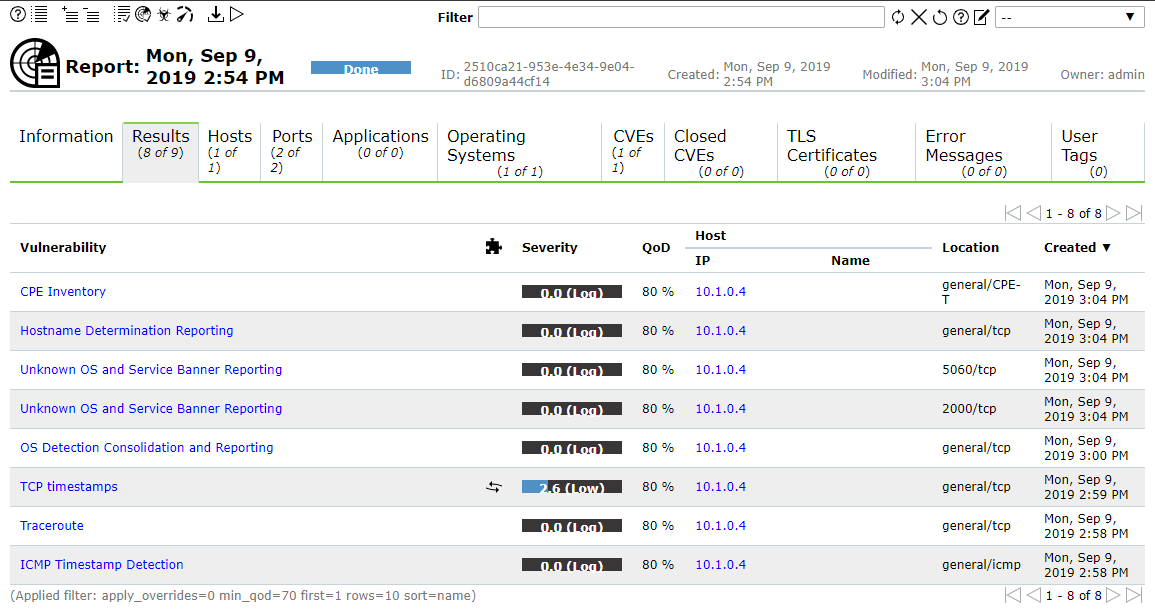
掃描完成後的畫面
選擇 Last Report 可以看到名細

