ELK Debian 安裝教學
BUBU 因最近有一個案子需要把設備資訊輸出到 Elastic 的 ELK 服務進行收集及分析,因之前是架設在 CentOS 環境這次是換架設在 Debian 環境上運行,這一次安裝的版本是 Elastic 8 版
ELK 簡介
ELK 是一個日誌分析平台,主要由 Elasticsearch、Logstash、Kibana 這三套服務搭配使用。
Elasticsearch 是一個全文搜索和分析引擎,它可以實現數據的實時全文搜索,可以處理大規模日誌數據,例如:Nginx、Tomcat、系統日誌等功能。
Logstash 負責日誌收集和轉發,支持日誌過濾、普通Log、自定義 json 格式的日誌解析。
Kibana 通過接口調用 Elasticsearch 的數據,並進行前端數據可視化。
運行環境
本工作室環境都是在 「Proxmox VE 」 虛擬系統上架設,都是以 「 LXC 」模式為主,除非有特殊狀況會告知使用 「 VM 」 模式
- 系統環境: Debian 12
- Web 服務: Nginx 1.24
安裝過程
- 新增加
Elastic金鑰
wget -qO - https://artifacts.elastic.co/GPG-KEY-elasticsearch | sudo gpg --dearmor -o /usr/share/keyrings/elasticsearch-keyring.gpg
- 新增加來源庫
echo "deb [signed-by=/usr/share/keyrings/elasticsearch-keyring.gpg] https://artifacts.elastic.co/packages/8.x/apt stable main" | sudo tee /etc/apt/sources.list.d/elastic-8.x.list
Elasticsearch套件
- 安裝
Elasticsearch服務
sudo apt update && sudo apt install elasticsearch
- 安裝完之後會有以下的訊息
Authentication and authorization are enabled.
TLS for the transport and HTTP layers is enabled and configured.

# 這一行是隨機產生的密碼需記錄下來,後面想要修改再來處理
The generated password for the elastic built-in superuser is : 0OQ+LKCQy*_jSo

If this node should join an existing cluster, you can reconfigure this with
'/usr/share/elasticsearch/bin/elasticsearch-reconfigure-node --enrollment-token <token-here>'
after creating an enrollment token on your existing cluster.

You can complete the following actions at any time:

Reset the password of the elastic built-in superuser with
'/usr/share/elasticsearch/bin/elasticsearch-reset-password -u elastic'.

Generate an enrollment token for Kibana instances with
 '/usr/share/elasticsearch/bin/elasticsearch-create-enrollment-token -s kibana'.

Generate an enrollment token for Elasticsearch nodes with
'/usr/share/elasticsearch/bin/elasticsearch-create-enrollment-token -s node'.

-------------------------------------------------------------------------------------------------
### NOT starting on installation, please execute the following statements to configure elasticsearch service to start automatically using systemd
 sudo systemctl daemon-reload
 sudo systemctl enable elasticsearch.service
### You can start elasticsearch service by executing
 sudo systemctl start elasticsearch.service
- 啟動服務之前先修改
jvm記憶體官方預設是最少 4G 最大 64G 因 BUBU 是安裝在LXC環境所以沒有設定很大,因此需要去修改jvm的記憶體大小vim /etc/elasticsearch/jvm.options新增以下的參數。
-Xms4g
-Xmx4g
- 啟動服務
sudo systemctl daemon-reload && sudo systemctl enable --now elasticsearch.service
- 服務狀態
sudo systemctl status elasticsearch.service
- 測試服務是否正常運行, 修改
$ELASTIC_PASSWORD改成剛剛安裝完所提供的資訊裡面就提供密碼再填入
curl --cacert /etc/elasticsearch/certs/http_ca.crt -u elastic:$ELASTIC_PASSWORD https://localhost:9200
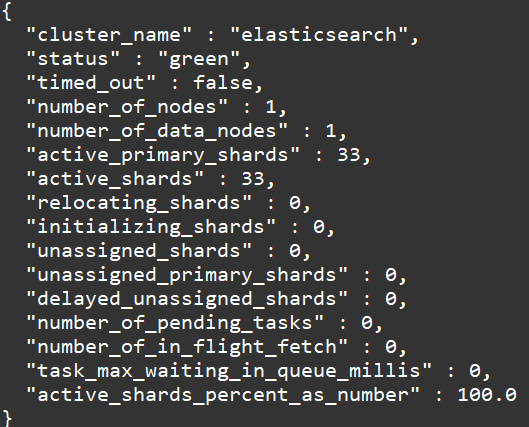
- 顯示結果如下
- 節點運行狀況
curl –XGET -k -u elastic:ELASTIC_PASSWORD https://localhost:9200/_cluster/health?pretty=true,正常是狀態是green
Kibana套件
- 安裝
Kibana服務
sudo apt-get update && sudo apt-get install kibana
- 設定
Kibana與Elasticsearch服務註冊使用,系統會產出一串Token要把記下來並且等一下會需要貼到網頁上
cd /usr/share/elasticsearch/
./bin/elasticsearch-create-enrollment-token -s kibana
- 設定
kibana.yml設定檔vim /etc/kibana/kibana.yml
server.host: "0.0.0.0"
server.publicBaseUrl: "http://192.168.10.114:5601"
- 啟動服務
systemctl enable --now kibana
- 將剛剛所產出來的
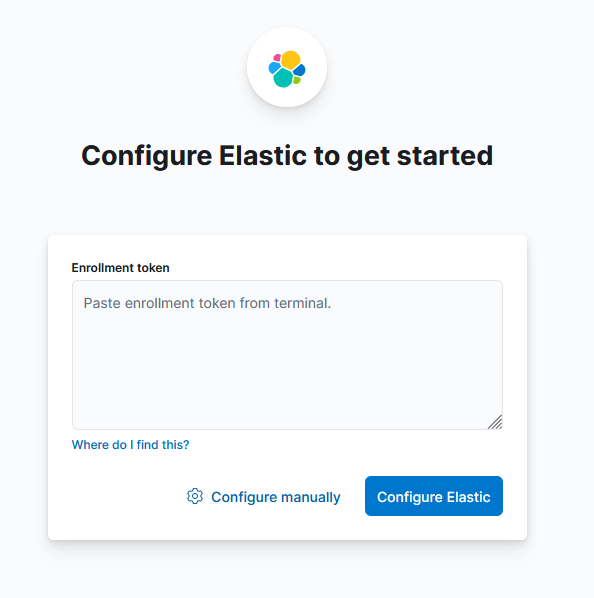
Token貼上來然後按下Configure Elastic
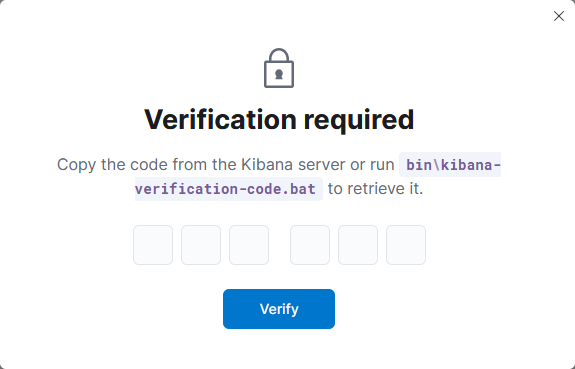
- 這裡是要您填入認證碼,認證碼可以用下一張圖片裡面有一個
code=123456看到之後再填入就可以做認證動作
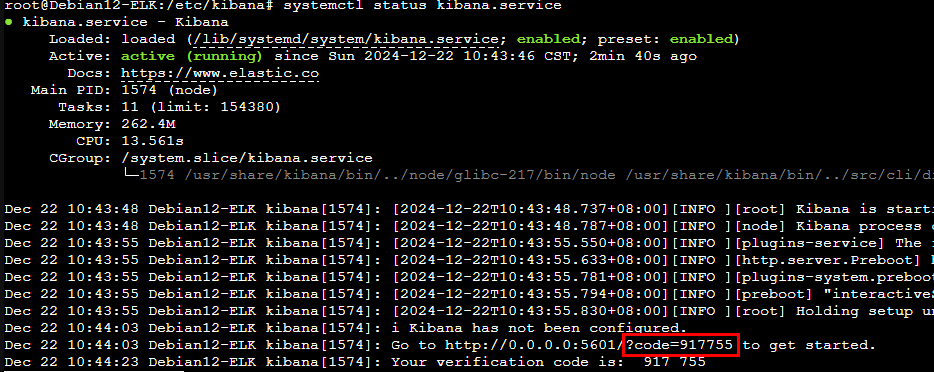
- 查詢認證方式為
systemctl status kibana.service就可以看到紅色框框裡面的數字就是驗證碼
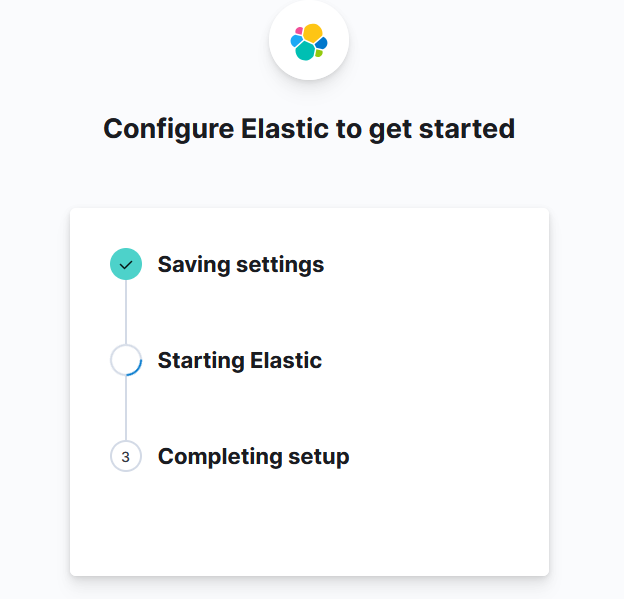
- 驗證完後系統就會開始跑一些設定並且進入到系統畫面
- 這是進入到系統的畫面
Logstash套件
- 安裝
Logstash套件
sudo apt update && sudo apt install logstash
- 啟動服務
sudo systemctl enable --now logstash
- 服務狀態
sudo systemctl status logstash
- 檢查配置是否正確例如:
test.conf
sudo /usr/share/logstash/bin/logstash --config.test_and_exit -f /etc/logstash/conf.d/test.conf
安裝其他搭配 ELK 套件
-
其他套件:
-
Filebeat:用於日誌的輕量型採集器,通過提供一種轉發和匯總日誌與文件的輕量級方法,讓簡單的事情不再繁雜。
-
-
套件安裝指令
sudo apt install filebeat
參考相關網頁
- How to Install and Configure Elasticsearch, Kibana & Logstash [8.12] version on Ubuntu Linux | 2024
- How to Install and Configure ELK Stack [8.12] version on Ubuntu Linux | 2024
- Elastic Stack 8 - Install and Configure Elasticsearch + Kibana on Debian Linux
- Install Elasticsearch with Debian Package 官方文檔


